Since you are looking for WordPress settings then you must have started with your WordPress blog. This tutorial will help you to configure essential WordPress settings which need to be done before making your website live over the internet.
If you are still having a second thought for getting your business online then drop it and get started with showing the online presence. We have covered lots of tutorials on our website to start a successful WordPress website.
We have tied up with the industry’s best web hosting providers to offer you fast and reliable web hosting for your website with free domain name and SSL certificate. So if you are still in search of hosting services for your website then come to a halt.
You can either select any shared hosting plan from Hostinger or HostArmada to start your website. Both the hosting providers are reliable, fast and SEO optimized. Additionally, they are offer freebies including a free domain name, SSL certificate, Caching, and much more. Visit them for more details.
If you face any issues with these hosting providers then simply contact us from our contact us page.
This tutorial will help you configure 50 essential WordPress after installation to make your website secure, fast, and optimize. This setting is important and must be done before you start publishing content. If you are still facing any issue in installation on WordPress then go through our step by step guide for installation of WordPress via various methods.
WordPress itself is quite secure but to get the additional functionalities you need certain plugins. These plugins and WordPress settings to be configured properly for best results. Hence be cautious enough while carrying out these settings.
You Should not miss this:
Once you carry out the settings and start publishing the content, the overall architecture of your website changes and needs to be optimized properly. So need a tool that can effectively scan your website and give you shortcomings that can be restored to get higher Google search engine ranking.
The tool I personally use for my websites and also for my clients is SEMRush. This is the best website optimization tool that can eventually help you to take your website to the next level.
You can initially start with the SEMRush free trial and if you find it effective then go with the premium plans. But initially, I would recommend you use the tools for at least 3 months for better results.
Start with SEMRush 30 Days Free Trial
Let’s move ahead with your Essential WordPress settings
The essential WordPress settings are divided into three sections that include:
- Basic settings
- Intermediate settings
- Advanced settings
The advanced settings should only be attempted by those WordPress users who are conversant with editing theme files and have little knowledge of coding.
50 Essential WordPress Settings
These are the most simple but important setting which needs to be carried out immediately after installation of wordpress. In this section, you will learn the basic setting needs to be carried out and the reason why they are required.
1. Reset Installation Password
The first step when you install WordPress via cPanel, softaculous or any other auto installer you need to change the automatically generated password by the auto installer. The automatically generated password is susceptible to brute force attack and hence can compromise your website.
Resetting your password is very simple.
- You should log in to your WordPress dashboard.
- On the left sidebar menu locate the menu ‘Users’ and a sub-menu – ‘Your Profile’.
- Click on generate password to create a new strong password.
The password generated from this very strong password and difficult to trace. You should generate the password and save it at a place where it not accessible by others. You can also show or hide password by clicking the button as shown below.

You should choose the password WordPress generates for you or you can use an alternative password generation software like – LastPass, to generate strong passwords.
2. Clean Up Your WordPress Dashboard
The second step is to go to wordpress dashboard and clean it up. There are many plugins which are automatically installed when to carry out wordpress installation via auto installers. You practically don’t require all these plugins and needs to uninstalled.
There are also other default WordPress dashboard widgets, but you may not want to see them every day you log into your site.
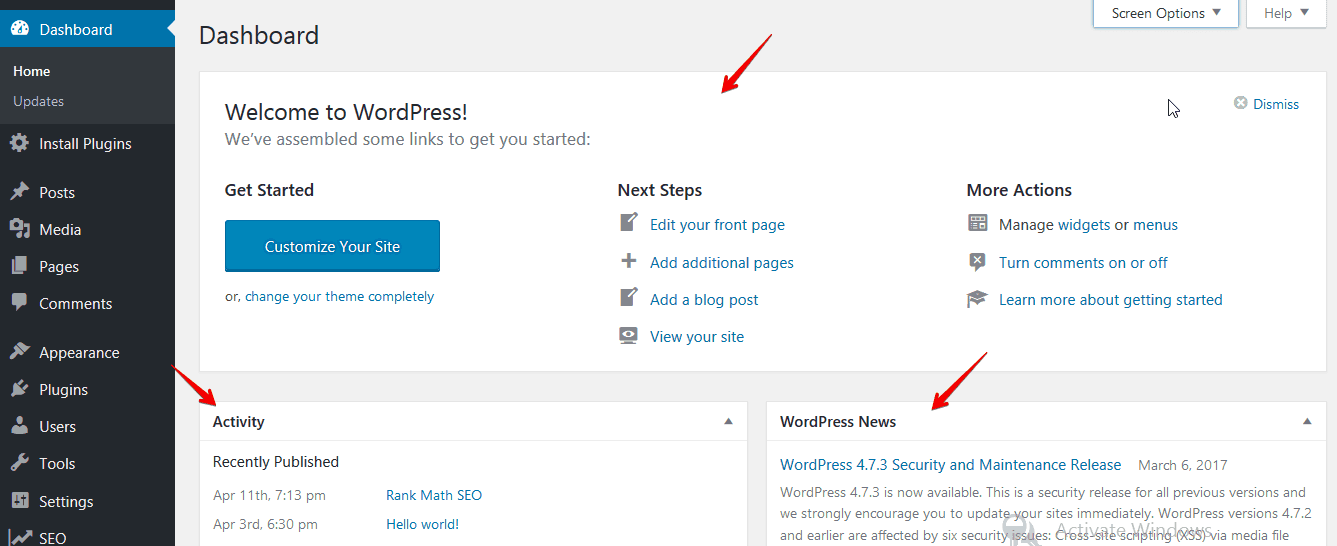
- On your WordPress dashboard top locate the ‘Screen Options’ drop down option on the top right corner as shown in the image below:

- When you click on the Screen Options a drop down option menu appears, check the widgets that you want to see in your dashboard.
- For the widgets that you do not want to see like ‘Welcome’ uncheck it. Unchecking will hide all those dashboard widgets that you do not want to see.

Ideally, you should only choose to show those widgets that are very useful in your day to day management of your site. This setting helps you to remove clutter from your dashboard and avoid confusion especially if you are new to WordPress.
3. Setup Website Title
The third thing is setup your website title, nearly all wordpress installation comes up with the default website title. Setting up website title is important as your title will show the glimpse of the content that your website will be having. It will also help in google search engine indexing of your website.
- On the left side, menu click on ‘Settings > General Settings
- On the Site Title box, type your site title as shown in the image below:

- You can also edit this site title via the WordPress customizer. Under Appearance Menu on the left sidebar dashboard menu look for Customize sub menu.
- When you click on it, a customizer appears where you can edit the site title and the tagline as shown in the image below.

When you save the settings, your website title will be shown on the front page of your site and will also appear in the search results. Site Title is basically what your website is about.
4. Set Your Website Tagline
When you install WordPress, it comes with the default tagline ‘Just another WordPress site’ you should change this tagline since it also appears in search results, your tagline should tell people more about your site.
A tagline is a branding sentence that summarizes what your brand or website is about. You should have something creative for your tagline.
- To change the tagline, under the General Settings and below the Site Title settings type your tagline as shown below.

When you save the settings, your tagline should appear on your site front end as well as in the title tag.
5. Setup Your Preferred Site Address – WordPress (URL) Address & Site Address (URL)
Setting up the preferred site address is a very crucial step since it will affect how visitors get to your site. You can either choose to use ‘www’ or ‘http’ depending on which way you want your URLs to appear and type in the WordPress Address field.

If you want your site homepage to have a different URL than the folder in which you installed WordPress, you should use the Site Address (URL) field to type the homepage URL, as shown above.
6. Uncheck Membership Option on General Settings
If you find that your Membership option is checked (Anyone can register) under the General Settings, you need to uncheck it in order to control who can register on your site.

Leaving this option checked allows anyone to register on your site and opens the opportunities for spammers to take advantage and register on your site.
7. Set the Date and Time Settings
WordPress is the most popular blogging content management system. Under the General Settings, you are allowed to set how your dates should be displayed, the time format and when your week starts.
- These settings allow you to take control of how the time and date are displayed on your site. You can also set up your time zone from the General Settings.
- Under the General Settings you can set up the time and date settings as shown on the image below:
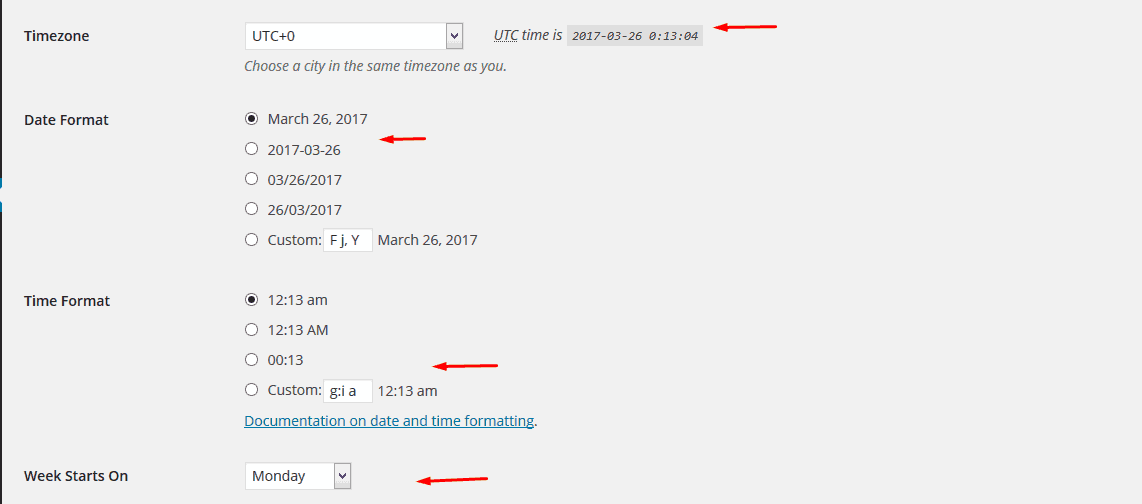
This is an important setting for bloggers and it should also be useful for you when you are scheduling content to get published in the future dates.
8. Setup Language Preferences
WordPress lets you set your preferred language. There is a very long list of all the languages available. If you are blogging in your native language and your audience is native, it may be a great idea to have WordPress translated in your native.
- Under General Settings > Site Language choose the preferred site language and save the settings.
- You can also set the language preference setting when you are manually installing WordPress

It is important to note that some themes are transition ready and make it easy for you to blog in your native language. All themes now days are translation ready and you can use any of them to blog in your native language.
9. Update WordPress Version
Some automatic WordPress installers are packaged with an old version of WordPress. When you install WordPress and see the update notice, you should immediately update WordPress for a secure and optimized site.
- You can update WordPress installation to the latest version by clicking on the notification that appears on top of your dashboard widget shown below – click on ‘Please update now’.

For new site, you may not have to backup any files before the WordPress update.
10. Delete Dummy Content – Hello World! Post and Sample Page
After installing WordPress, you will see that you have a sample page that shows how your website pages will appear and also a sample post titled ‘Hello World’.
- Click on your “All Pages” Menu and “All Posts” Menu and delete the post and sample page using the trash button for you to start creating your site pages.

11. Create Basic Site Pages
After deleting the sample page, you need to create your site’s basic pages. There are three most common basic pages: About, Contact and Privacy Policy.
- To create these pages, click on “Add New” under the Pages Menu and fill in the page title and the content then publish the page.

- It’s also important to create your basic pages first before you can create your website menu.
- To create a contact page, you need to add the shortcode from Contact Form 7 plugin to the page content area as shown in the image below:

12. Setup Your Site Menu
Setting up your website menu is very easy.
- You should navigate to the Appearance menu on the left sidebar dashboard menu and click on “Menus”.

something like ‘Primary Menu’ then add the items to the menu by checking the pages on the left side and clicking ‘add to menu.’

- You can reorganize the menu items by dragging and dropping up and down. You can also edit the menu items by clicking on the downward arrow.
- When you have the menu done, you need to select where the menu should appear in your theme. You can alternatively manage the location of menus using the Manage Menu tab.
Save the menu you created and visit your front-end to see how it appears.
13. Delete Unused Plugins and Themes
It is not advisable to have a site that is bloated with themes and plugins that you are not using. You should delete plugins and themes that you are not using but ensure you keep an updated copy of the default WordPress theme.
You should not delete the default WordPress theme; instead, you should always update it. The main reason why you should not delete the default WordPress theme is the fact that if your current theme is broken, WordPress reverts to the default theme. This avoids our site hitting a white screen of death.
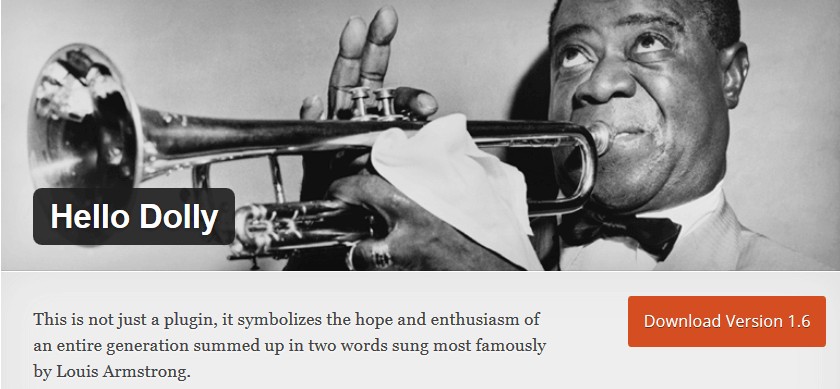
For plugins, it is not good to have plugins installed that you are not using and therefore delete the basic plugins like ‘Hello Dolly’ and those other plugins that come with your WordPress installation.
Sometimes cPanel WordPress installation software has plugins installed that are of little use, ensure you delete all those unnecessary plugins.
14. Update Existing Plugins and Hide Description
When you install WordPress through automatic installers, pre packaged plugins may be outdated. Plugins like Akismet that stops spam to your WordPress site need to be updated.
- Go to the plugins page and check for those necessary plugins installed that need to be updated.
- You should update the plugin by clicking on the update link that is on each plugin description as shown in the image below:

- When you have updated all your plugins, and want to clean up your plugin’s page, you can hide the descriptions using the screen options above the plugins’ page. Here is an illustration of how to hide the plugin’s descriptions:

You should uncheck that option to hide all the plugin descriptions and check it when you want to see the descriptions; this keeps your plugin page clean.
15. Permalinks
WordPress Permalinks are the settings that control how your website URLs appears when you publish pages and posts. Setting permalinks is paramount before you start publishing content on your site.
You can set permalinks by navigating to Settings > Permalinks menu
Permalinks have SEO significance, and therefore you should change the default permalink setting to this custom structure setting:
/%postname%/
You can also add a category to your permalinks so that they appear with the category:
/%category%/%postname%/
You can also add category, post name and post ID with the following:
/%category%/%postname%/%post_id%/
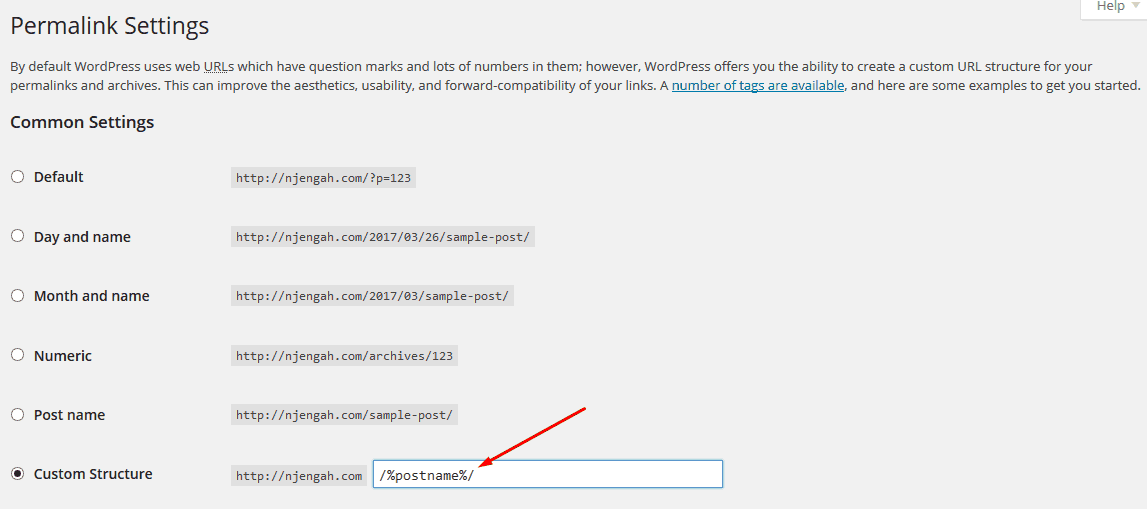
Caution: Permalinks structure should not be changed in future since it may render all the content published before the change to 404 pages. This is not only frustrating to your visitors but will have a serious negative impact on your site rankings.
Intermediate WordPress Settings
Intermediate settings are necessary settings but may require a better understanding of how WordPress works. You should be careful not to mess with your WordPress installation especially settings that require editing theme files.
16. Add WordPress Ping List
Adding a WordPress ping list to your WordPress site allows you to have automatic notifications to all the ping services when new content is published on your website. You can add as many ping services that should be notified when you publish a post.
- Navigate to Settings > Writing and look for update services option.
- Add the list of the ping websites and save. As you can see below, WordPress by default has only one ping service:

There are many ping websites, and you can search on Google for the latest ping list and use it.
17. Add and Remove Widgets on Sidebar
Nearly all WordPress themes come with widgets and you can place the widgets on the sidebar either left or the right sidebar. There may also be other sections in the theme that are ‘widgetized’, but the default WordPress widget area is the sidebar. WordPress also has inbuilt widgets that you can add on your sidebar.
- To add widget, you should navigate to Appearance Menu > Widgets
- On the widgets page, the left side has the widgets that are available, and you can drag them to the widget areas on the right. You should click on the widget drop down arrow for further settings.

- There are all kinds of WordPress widgets that you can add to your sidebar like social media, recent posts, search bar and images widgets
You can search for more widget plugins on the WordPress repository that are available for free. MyThemeShop has one of the most popular tab widget plugins named as “WP Tab Widget” that will enhance your tabs appearance such that they will look more appealing to the user as compared to the default tabs.
18. Create Posts Categories
WordPress posts are grouped into different categories that you can add and categorize the posts as you create them. When you are creating your new website, you probably have an idea on what content you want to publish.
You should use the content topics to form categories for the posts. Creating categories helps keep your content organized and also creates an easy way to navigate your site.
- To create categories go to Posts Menu on the sidebar and click on add category.
- Fill in the category details including the name, slug and a short description.
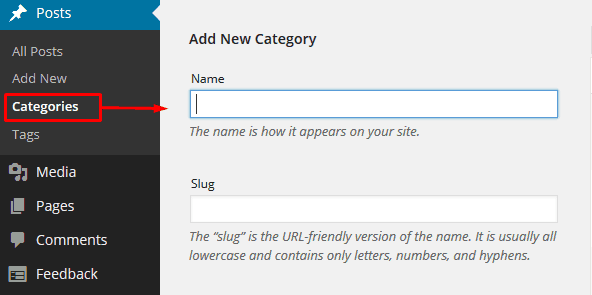
You should also rename the default category from ‘Uncategorized’ to a different name. All posts that are not categorized will appear under the Uncategorized category.
19. Connect Google Analytics
Google Analytics helps you to track daily, monthly and annual traffic of your website and it’s very useful for tracking your general traffic growth. Google Analytics requires you first sign up for the Analytics account using your Gmail.

There are a number of ways to add Google Analytics to your website and they include:
- Adding Google Analytics to header file (header.php) – You should open your header.php file and copy the file on below the Meta tags. This is not recommended for beginners since it entails editing WordPress theme file.
- Adding Google Analytics via Theme Settings – If you have a theme that has an options page, look for a section ‘add Google Analytics code’ or an ‘add scripts to the theme header.’ Copy the code there and save the settings.
- Adding Google Analytics using a Plugin – This is the easiest method, it takes few minutes and is the most popular way to add Google Analytics. The best plugin to use for this is Monster Analytics. Install the plugin, activate and go to the settings and automatically authorize it to connect to your analytics account.
20. Adding Google Webmaster Console and Verifying Your Website
Verifying your website with Google Webmaster Tools has several benefits and it is highly recommended you verify your site as soon as you complete the WordPress installation.
Google Webmaster Tools lets you know when crawl errors occur on your site. It also provides detailed data regarding your site search index, rankings, 404 errors and general SEO health of your site.
- Before you set up Google Webmaster console in WordPress you need to add the site first in the console.
- You should be prompted to upload a Meta tag in your site for verification.

There about three ways you can use to upload the Meta tag to your site, they include:
- Uploading Meta Tag and verifying – In this method you have to edit the header.php file and add the Meta tag code on directly the header.php code. This method is not ideal for beginners since it will be difficult and requires some HTML and php coding skills.
- Adding Webmaster Console through theme settings page – Some themes have a section to add scripts to the header under the theme options page. This code should be added to this section, then click on the verify button in the Google Webmaster Console to confirm your site is verified.
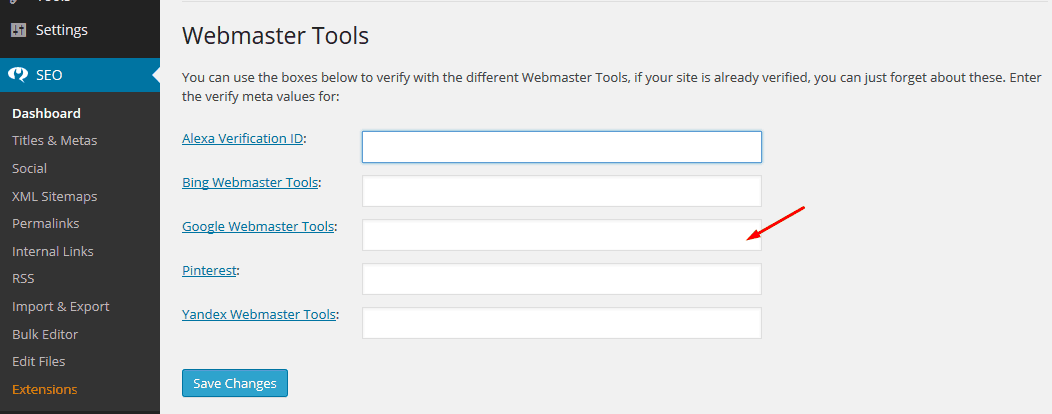
- Adding Webmaster Console using a plugin – This is the easiest way to add and verify your site with Google Webmaster; you should install and activate Yoast SEO plugin. On the Yoast SEO menu click on the Webmaster settings and copy and paste the meta tag code on the Google Webmaster Tools space as shown in the image below:
21. Contact Form and Page
We previously mentioned (in Step – 11) that you need to create the most important pages on your website. One of the pages that you should create is Contact Page. The contact page comprises of your contact details, and it improves the user experience if you can add a form that users fill to contact you.
Creating forms in WordPress is very easy because there are free plugins that create forms within minutes. One such plugin that is used by millions of websites is Contact Form 7.
- Install and activate Contact Form 7 plugin
- Click on the contact menu that appears on the sidebar menu to begin creating forms.
- There is a default form shortcode that is ready and you can simply use that form shortcode by copying the it and pasting it into your contact page. (as previously illustrated in step 11 above)

You can also create advanced forms using the Contact Form 7 settings or change the entries in the default contact form. You can also set the email where the inquiries from the form are sent.
22. Update your WordPress profile
You should update your author information which includes; the display name, the bio, and social media links.
- You can update your profile under the User Settings, where you can add a brief bio about yourself.
- You can also add social media links that will appear on your author bio.
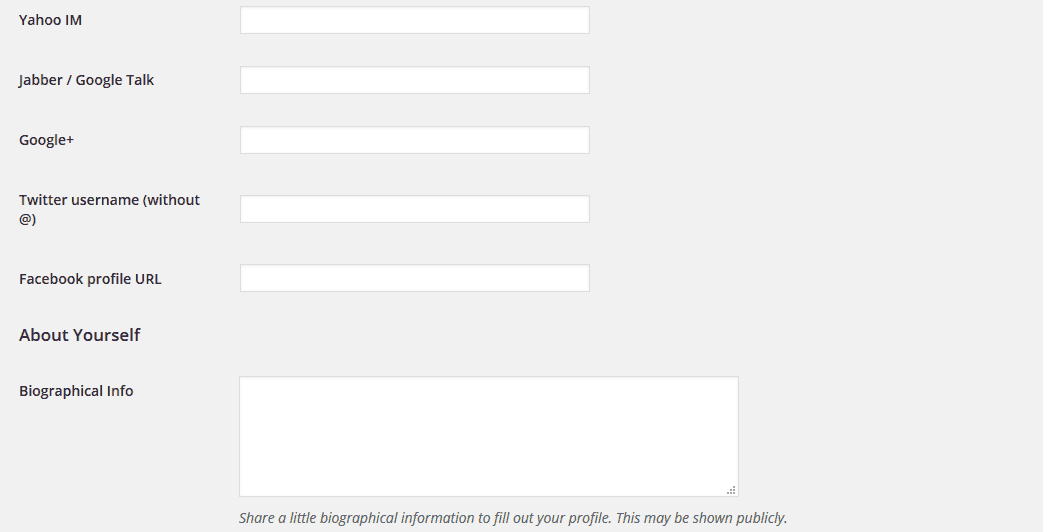
Finally, you can add a ‘nickname’ or the name that you would like to display on the posts and set it as the name that should be shown.
23. Add Other Users to Your Site
After editing your user profile, you can add other users to your site and assign them different roles. This is particularly useful for multi-authored blogs.
- To add a new WordPress user, go to Users > Add User and fill in their details.
- The most important setting is the Send User Notification – select this option to send new users the password.
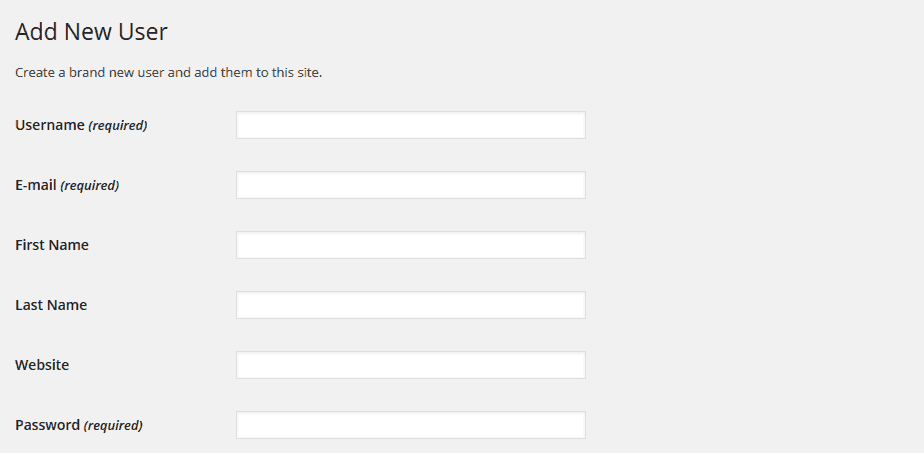
The new user will be notified via email, and they can log in to update their profile and change the password.
24. Add Logo and Favicon
Favicon is an icon that appears at the beginning of your domain and makes it easy for visitors to identify your site on the browser when multiple tabs are opened.
This small icon should represent your brand and should be well designed and conspicuous even at the small size. There are several online free tools that you can use to create a favicon, but you can also design it with Photoshop.
- ‘Adding a logo and favicon gives your website an identity and helps you to start creating a brand.
- To add a logo, you should go to Appearance > Customize > Site Identity then upload your site logo.
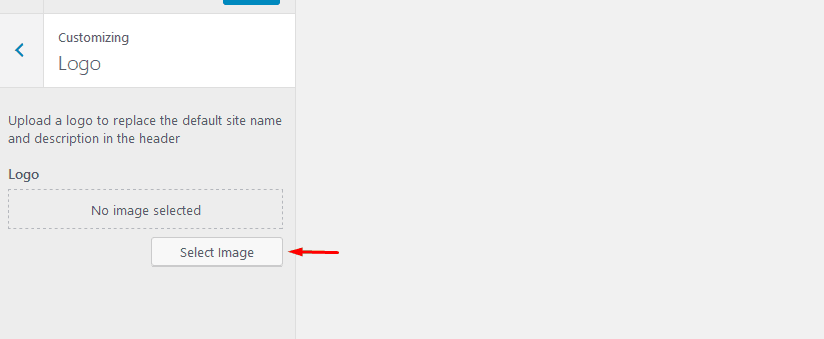
You can also create and upload a favicon under theme settings. Different themes have a place to upload your site’s favicon.
25. Configure the Reading Settings – Set Homepage
The reading settings are very important for setting the front page of your website and the blog page. If you have a homepage that you have created, you should set it up under the reading settings.
- To configure the reading settings, go to the Settings Menu on the left and click on Reading.
- Click on the drop-down ‘FrontPage’ option and select the page that you want to set as the homepage. For the blog page, choose the page that you want to set as the blog page and save the settings.
- You should then save the settings and visit your front-end to see if it works.
- Check the illustration below on how to set the homepage and the blog page under the Reading settings:

You should also select a corresponding blog page and ensure you have the pages published with the respective page templates.
26. Change the Default Admin Username
When you install WordPress from the automatic installers in cPanel, you may end up with the name ‘admin’ as your username. This is very common on all automatic WordPress installations, and it increases sites vulnerability to getting hacked.
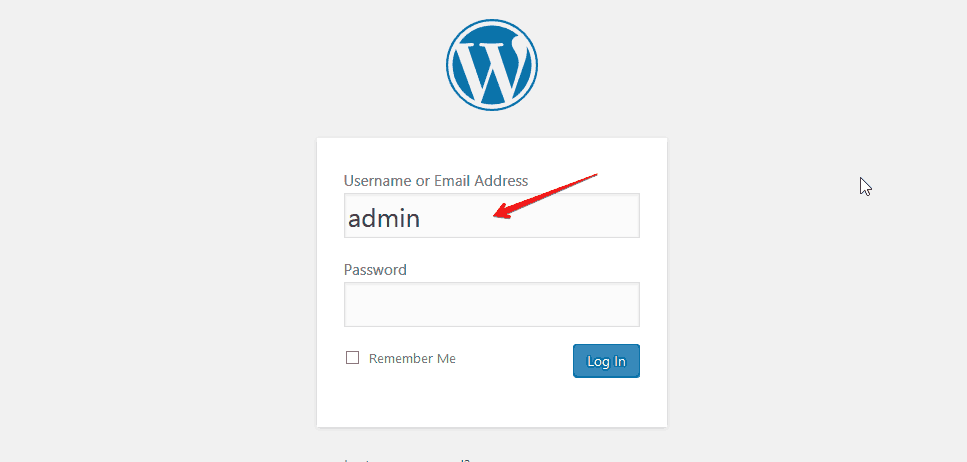
You need to immediately change this username or delete the default account. On the WordPress dashboard, it is not possible to edit the username, but you can edit it from the PhpMyAdmin panel in your hosting. You can also delete the default admin account after creating a new admin account.
27. Setup Gravatar
For you to have a profile photo displayed along with your author details, you should use the photo displayed along with your author Gravatar service to create your own avatar.
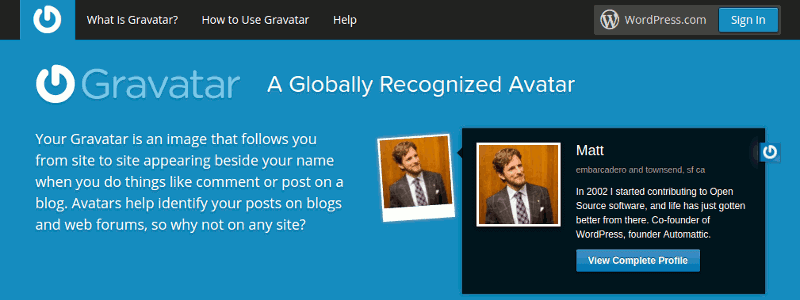
This is a free service and you can sign up and automatically your Globally Recognized Avatar will start appearing on your author profiles across all your WordPress sites.
Essential Plugins to be Installed After Installing WordPress
28. Install Caching Plugin
One of the necessary WordPress plugins that you must install after installing WordPress is a caching plugin. This plugin improves your site speed and optimizes the performance by clearing the cache.
There are two most popular WordPress cache plugins; WP Super Cache and W3 Total Cache, the latter is my favorite since it has advanced features like the ability to link up with content delivery networks which improves the page load speed.
- Go to add plugins and search W3 Total Cache or WP Super Cache and install either.
- When you install, go to settings and try to clear the cache after setting your preferred settings.
29. Install WordPress Security Plugin
WordPress sites are easily hacked, especially those sites that are not well secured. After installing WordPress, you should begin taking all the necessary precautions to secure your site. The most efficient way to secure a WordPress site is using a reputable free security plugin.
There are many security plugins, WordFence and Sucuri are among the best security plugins that are available for free download. A good security plugin should have important features that include:
- Spam IP blocking.
- Limiting malicious logins on the admin page.
- Second authentication option for logins.
- Scanning for malware.
30. Install Anti-Spam Plugin- Akismet
WordPress has a very easy to use and free anti-spam plugin named as “Akismet” that was developed and maintained by the WordPress Company – Automattic.
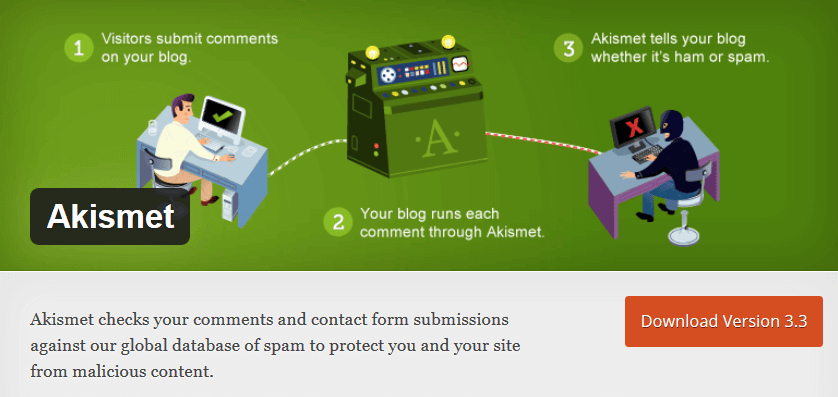
- This plugin is the first that you should install and activate but in most cases, it comes installed with the default WordPress installation.
- To activate Akismet, you will require an API key which you can generate from their website for free.
31. Install Yoast SEO WordPress Plugin
When you are publishing your content in WordPress, you want the pages and posts to be well optimized for better search rankings. The most effective way of optimizing your posts and pages is using Yoast SEO plugin.
There are a number of SEO tasks that you can accomplish with Yoast SEO like:
- Linking Webmaster Accounts.
- Social Media Links.
- Sitemaps creation.
- Permalinks setup.
- Controlling overall sites Meta descriptions.
You should add and activate Yoast SEO plugin so that you can start optimizing your site.
32. Install JetPack Plugin for Social Media Auto Posting
JetPack plugin is very useful for linking your site to wordpress.org and publicizing your content on social media. You should consider installing it and setting up the social media accounts that help to automatically post content published on your site to your respective social media accounts.
You can set up JetPack publicize settings under the main plugin’s settings page as shown in the image below:

This gives your content social media exposure. Every time you publish a post, this plugin automatically shares the post across all your social media accounts.
33. Disable Comments for Pages
After installing WordPress, your site might be vulnerable to a high number of spam comments. WordPress pages have a comment form, but in most cases, you do not want comment on pages.
- You should install a plugin to disable comments on pages.
- If your theme has an option to disable comments on pages, ensure you disable all comments on pages.
34. Add Comments Management Plugin – Disqus
Comments management using the default WordPress comments template sometimes turns chaotic. The default WordPress comments template is somewhat easy to get spammed.

You will find adding a comments management plugins helps reduce spam on your site. One of the best plugins for managing comments is Disqus, you need to create an account on their site before you can integrate it into your WordPress site.
35. Schedule Backups for Your Site
WordPress backup is a very crucial step after installing WordPress. Creating WordPress backups is very easy since there are several free plugins like “Backup WordPress“ that you can use for your backup.
Most will back up your site files on FREE cloud storage services like DropBox and Google Drive.
36. WooCommerce Plugin
For WordPress themes that require WooCommerce, after installing WordPress, you should install WooCommerce plugin for e-commerce functionality.

- To install WooCommerce > Go to Add Plugins and search for the “WooCommerce” plugin.
- Click on install and Activate the WooCommerce plugin.
37. Install broken link checker
After installing WordPress consider adding a plugin that lets you know if there are broken links on your site. Broken links on your site have a negative effect on your SEO. There is a free Broken Link Checker plugin available on the WordPress repository.
38. Add Google XML Sitemap
Adding Google XML sitemap is a vital step towards getting your site indexed by Google. After installing WordPress, you should ensure you add Google Sitemap and submit it on your webmaster console. To add Google Sitemap, you need a plugin to generate your sitemap.
It is recommended you use Yoast SEO plugin’s sitemap options. Yoast allows you to generate a sitemap, including and excluding pages, tags, categories, and media.
To generate your sitemap go to XML Sitemaps menu on Yoast and generate the sitemap as shown below:

Choose to include or exclude pages that you don’t want to see on the site map. Test this sitemap before you submit it on Google Webmaster Console.
39. Set Privacy – Stop Search Engine Indexing
After installing WordPress, you can stop search engines from indexing your site until when your site is ready. You can stop Google from indexing your site by checking the option under Reading Settings as shown in the image below:

It’s important to leave this option unchecked if you want to start publishing content immediately and getting indexed.
40. Discussion Settings
There are several comments settings that you can set on WordPress discussion settings among the most important settings, here are some :
- Allowing who comments on your site – you can limit the people who comment on your site by requiring them to register first. This is a great step towards stopping spam comments.
- Default Avatar for comments on your site – you can set your default avatar that appears in the comment section. It is possible to upload your custom avatar.
- Comments moderation and blacklist to control spam – You can block or moderate comments based on the content or certain words.
To setup discussion settings, go to Settings > Discussion

41. Media Settings
Images play a vital role in enhancing the visual appeal on your site. Nevertheless, images can take a large amount of memory of your site and this leads to slow page load speed.
One of the most important steps that you should undertake after installing WordPress is image optimization by reducing their size. This is to ensure that the stock images you use on your website are highly optimized along with your personal images as well.
Optimized images ensure your site is loading fast and ranks better in Google. There are many free plugins to slice images; Smush Image Compression and Optimization is one of the best plugins.
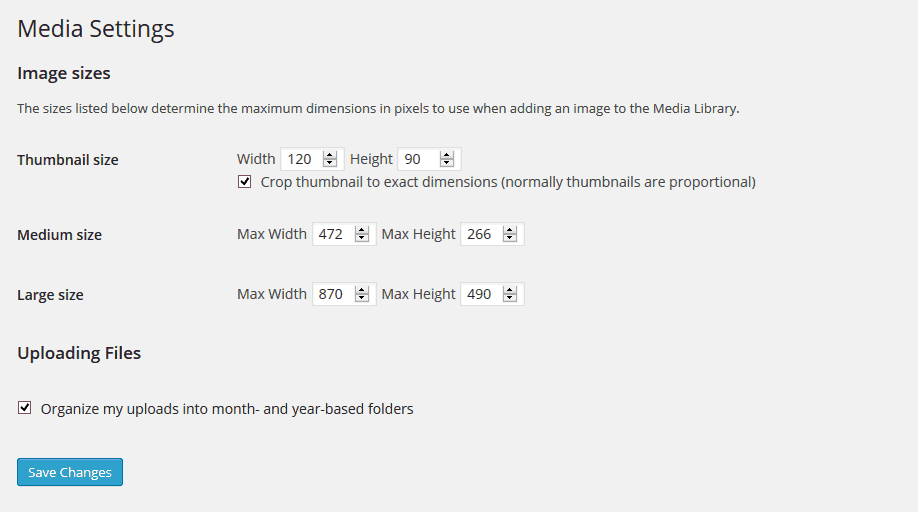
Image slicing plugins significantly reduce the size of your images without distorting the original visual qualities. You can also set up the size of images on your site under the media settings. Go to Settings > Media and set your preferred image sizes.
42. Change Default WordPress Login Logo
Changing the default WordPress logo on the admin page gives your site a professional look. The default WordPress logo can be changed by editing the functions.php file, but the easiest way is to use a plugin.
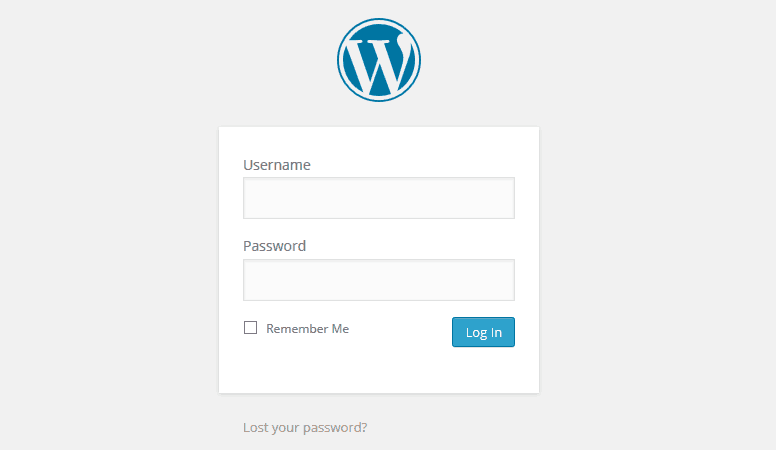
- There are several free plugins on WordPress repository that allow you to upload your brand logo to replace the default WordPress logo.
- Some of these plugins also allow you to tweak the background of the login page and give it a unique appearance.
Changing the default WordPress logo on the login page is particularly useful when you are building sites for clients using WordPress as a content management system.
43. Install WordPress Theme
After installing WordPress, you need to give your site a new look that suits your brand. There are numerous themes available on WordPress repository that you can install from WordPress dashboard.
- To install your first WordPress theme go to Appearance > Themes and click on “Add New“.
- You can test themes available in WordPress repository before installing.
- You can also upload a theme from your computer.
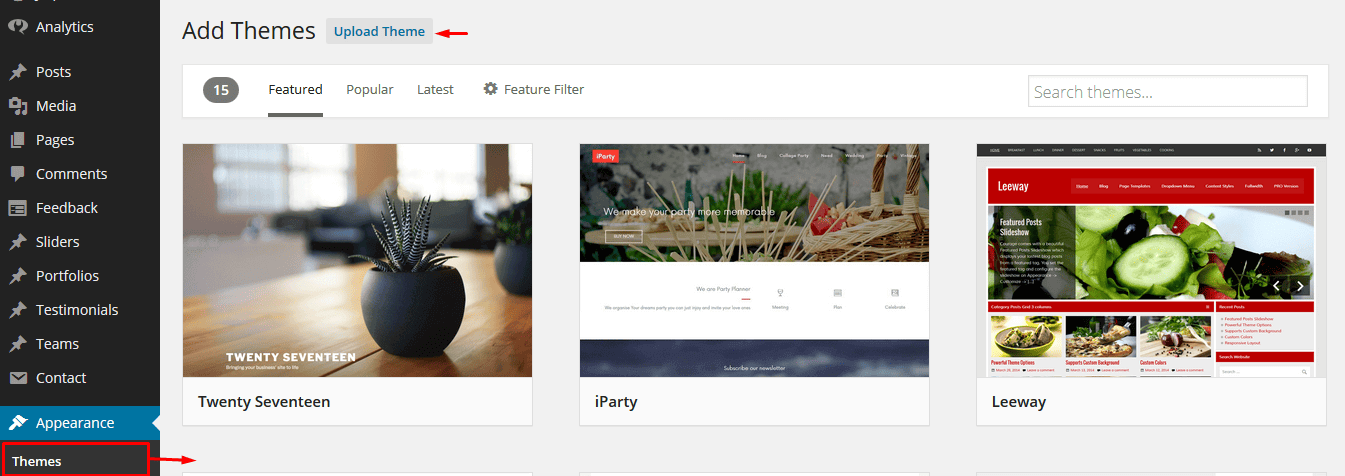
There are also several premium WordPress themes that are well coded and have a support team that maintains and updates them regularly. Premium themes have better design and are well-coded compared to the majority of free themes. You can check out some of the best FREE and Premium themes from MyThemeShop.
44. Setup a Coming Soon Page
After installing WordPress and you are still not ready to have visitors on your site. You should set up a coming soon page that blocks the front-end and allows you to work on your site from the back-end.
- There are several free plugins and themes for setting up coming soon page within minutes.
- One of the best coming soon themes that you can use is the Launcher.You can download the Launcher WordPress theme and install it for free.
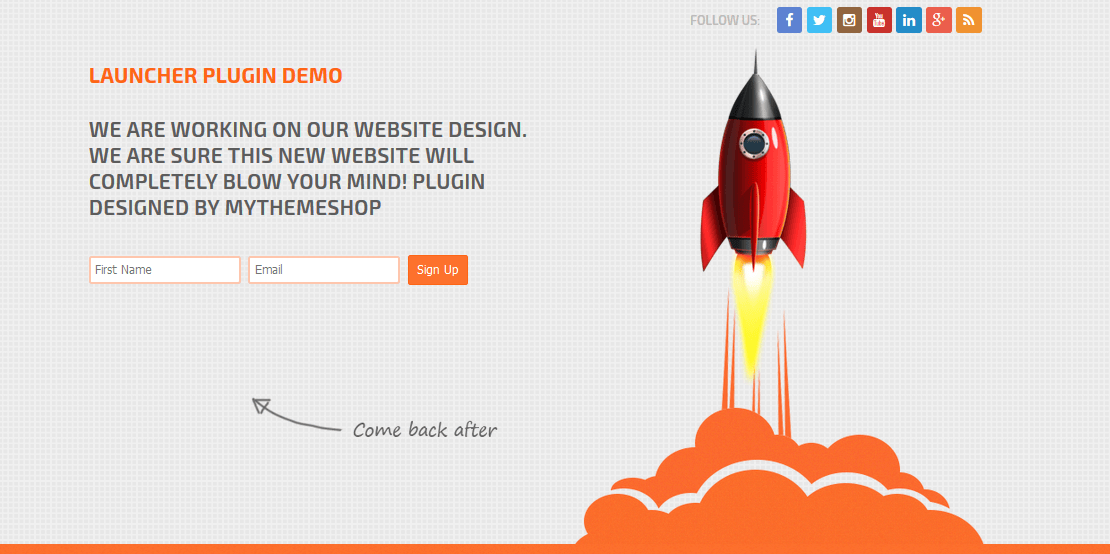
A properly designed coming soon page gives your website a professional look. A good coming soon theme like the “Launcher” theme should have a maintenance mode that you can activate in future when your site is under maintenance.
45. Locate Your Site Feeds and Add RSS to FeedBurner
Feeds are important for content syndication and aggregation. After installing WordPress, you should test your site’s feeds to see if its working. The feeds URL may be a sub-domain or a subfolder, and you can submit it to feeds directories.
For increased visibility of your content, you need to add your site to several feeds directories. One of the most effective feeds is FeedBurner.
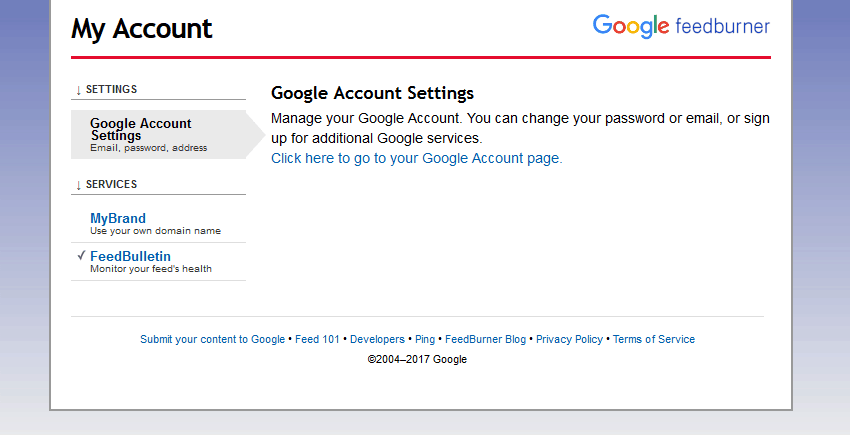
Signup on FeedBurner and add your site. This will ensure that your content gets visibility every time you publish new content since it appears on your feeds.
WordPress Advanced Settings
Advanced settings after installing WordPress should only be undertaken by those users who understand how to edit .htaccess file and WordPress theme files. Most of these changes can lead to a WordPress white screen of death or serious errors if not implemented correctly.
46. Disable Post Revisions
WordPress post revisions are changes on your posts that are stored for restoration if there is a problem with the original post. Each of the revision is stored in your database.
WordPress post revisions can be a nuisance since they use a lot of memory. You may want to disable them after installing WordPress.

- Fortunately, if you don’t like post revisions, WordPress lets you disable them by editing wp-config.php file. This step should only be undertaken by experienced WordPress users; beginners might find this to be challenging.
- To turn off the post revisions you should open wp-config.php and add the following code:
define ( ‘WP_POST_REVISIONS’ , false);
47. Block Access to WordPress Folders
WordPress folders can be accessed on the browser and you need to block the access of the wp folders after installing WordPress.
- You can simply block access to the WordPress folders by adding the following code in your site’s .htaccess:
Options All -Indexes
Before you edit your .htaccess it is important you create a backup copy. When you generate errors, you can always restore the original .htaccess file.
48. Stop Core Files Indexing by Google
After installing WordPress, you should control how Google Indexes your website. There are WordPress default pages that should not be indexed by search engines. You should confirm the status of your robots.txt files, and it should disable the indexing of these pages:
- WordPress admin login – /wp-admin
- WordPress Includes – /wp-includes
- WordPress themes – /wp-content/themes
- WordPress Plugin – /wp-/content/plugins
To stop Google from indexing these pages, your robots.txt file should be as follows:
User-agent:*

Disallow: /wp-admin

Disallow: /wp-includes

Disallow: /wp-content/themes

Disallow:/wp-content/plugins
You can check the status of your robots.txt file from Google Webmaster console.
49. Remove Meta Information in WordPress Header
After installing WordPress, when you view your source code, you will see that WordPress displays some Meta information on the header section like the WordPress version you are running on your site. It has been argued that hackers take advantage of this information and devise ways to hack your site.
- If you would like to hide the Meta information, you can add the following lines of code to your theme’s function.php file:
remove_action( ‘wp_head’, ‘wp_generator’ );
50. Disable HTML in WordPress Comments
Finally, you should disable HTML code in comments on your site. The majority of WordPress themes allow HTML in comments, this gives the opportunity to spammers to add links in comments.
- You can disable HTML in WordPress comments by adding the following code to your theme function.php file:
add_filter(‘pre_comment_content’, ‘wp_specialchars’);
This code disables HTML inside comments and safeguards your site from spam links insides comments.
Wrapping Up WordPress Settings
After installing WordPress it should be very easy for you to setup these settings and set your site ready for success. Some of these settings are necessary for your site to be secure, fast and well optimized for better ranking. Finally, the backup of your site and security are paramount.
Ensure you do not forget to search for free backup and security plugins that have the best ratings in the WordPress repository. I hope this list of all essential settings after installing WordPress is helpful.
If you liked this article, then please subscribe to our YouTube Channel for WordPress video tutorials. You can also find us on Twitter and Facebook





15 thoughts on “50 Essential WordPress Settings To Be Done After Installation (Important)”
Greetings! Very usefil advice within this article! It is the little hanges that make the most important changes.
Many thanks for sharing!
So make sure you might be dedicated to ideal type
of visitors in your market who you know will pay out cash what you might be marketing
them. Giving products at no cost should be a tactic or strategy
you’re deliberately using to generate more sales later.
The trick behind it really is looking hard enough and
developing patience as you search through search engines like google for which
you require in building your website.
Hi there superb blog! Does running a blog like this require a massive amount work?
I have very little expertise in computer programming however I had been hoping to start my own blog soon.
Anyway, if you have any recommendations or techniques for new blog owners please share.
I know this is off subject but I simply had to ask.
Many thanks!
You could definitely see your expertise within the article you write.
The world hopes for more passionate writers such as you who
aren’t afraid to mention how they believe.
At all times go after your heart.
It takes unwavering dedication to excellence to earn SAS70
certification, and providers who have include the industry elite.
Bluehost will not likely allow downtime to happen to the of their clients
since it is going to be big loss on them and the company will
not likely stay this long if they are giving poor service.
That should be sufficient enough, so investing in a package
that has far more is not required.
I too believe thence, perfectly composed post!
Hello.This article was extremely interesting, particularly since I was
searching for thoughts on this topic last
couple of days.
Wow! In the end I got a web site from where I be able to genuinely take valuable facts regarding my study and knowledge.
Fabulous, what a webpage it is! This webpage presents helpful information to us,
keep it up.
I was wondering if you ever considered changing the
page layout of your site? Its very well written; I love what youve got to say.
But maybe you could a little more in the way of content so people could connect with it better.
Youve got an awful lot of text for only having one
or two pictures. Maybe you could space it out better?
I always was interested in this subject and stock still
am, regards for posting.
Great post. I was checking constantly this blog and I’m impressed!
Extremely helpful information particularly the last part 🙂 I care for such info much.
I was seeking this certain info for a very long time.
Thank you and best of luck.
Of course, what a fantastic website and illuminating posts,
I will bookmark your blog.All the Best!
Excellent, what a web site it is! This webpage provides useful information to
us, keep it up.
Hey very interesting blog!