Website spped is the important factor for gitting better ranking on the google search engine.
A slow website is neither liked by the visitors and nor by the Google.
If we see the data, around 50% of the website over the internet are on WordPress. So it is very important to speed up your WordPress website to remain in the competition and avoid losing visitors.
A faster website always has more conversion ration in comparison with the slow website. Previously we have discussed the method to get perfect 100% on Google Page Speed Insights.
If you are still looking for a web hosting provider that supports Redis caching then I would recommend Cloudways or Mochahost.
If you have not selected the domain name for your website then this guide will help you.
If you have still not started then this is the right time to start your website on WordPress.
Why Redis is Required?
Redis is a data structure server that can be used as a distinct web server. In other implementation scenarios, its caching mechanism can be combined with MySQL or MariaDB to speed up WordPress database queries.
So in order to speed up your websites you require Redis. I am personally using Redis on my blog and can see a drastic change in page loading speed of my website.
Here have a look of my website score on google page speed insights.
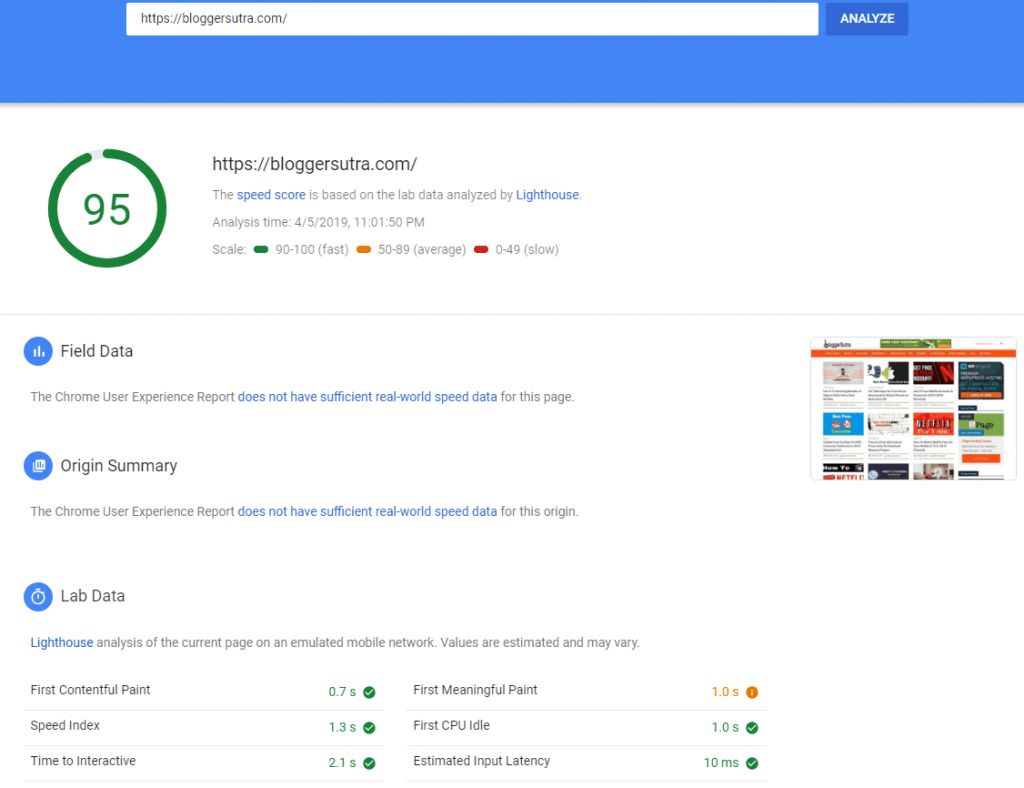
You can see a drastic improvement in the page loading speed of my website after enabling Radis caching.
Along with Redis cache you can also check the most essential WordPress plugins to power up your website.
Installing Redis Cache
Before we proceed toward configuring Redis, let’s first understand how to enable Redis caching on your hosting server.
But we would recommend you to take complete backup of your WordPress website.
In this tutorial we will be covering installation of Redis cache on Cloudways and Mochahost.
1. Install Redis Cache on Cloudways
Get 20% discount on Cloudways hosting.
Redis is by default installed on Cloudways server. In case it is not installed you can contact the customer support and they will install it for you.
However, you need to activate Redis cache manually on cloudways server.
To do this, first, you need to log in to your Cloudways account and navigate to Servers → Settings & Packages → Packages and then click on install Redis.
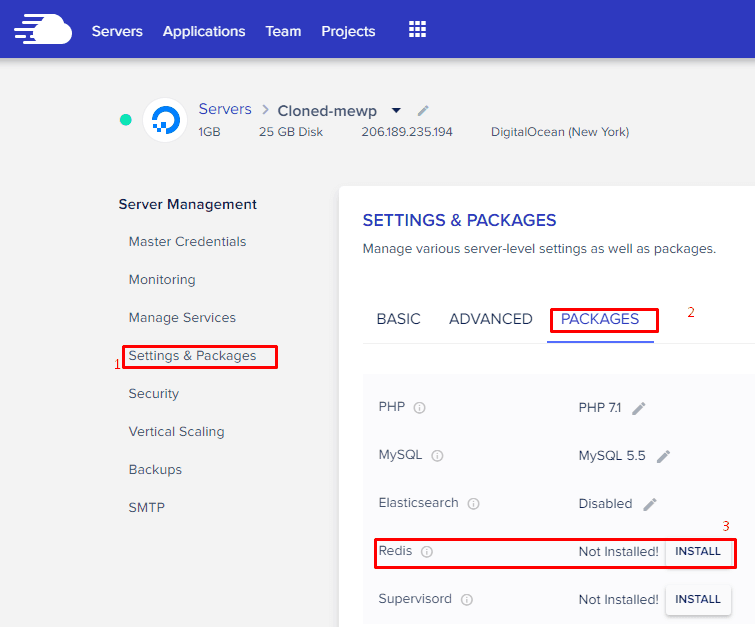
This will take some time to install WordPress Redis cache on your server.
Once the Redis is intalled, you should keep few details handy to configure Redis cache on WordPress website.
- Redis Host name (Normally it is 127.0.01)
- Redis Port number
- Redis Password
Before we proceed further let’s see how to activate redis through cPanel.
2. Install Redis Cache via cPanel
Get 50% off on Mochahost shared hosting package with Redis.
Installing Redis through cPane is very simple. Most of the cases Redis is already installed and you have to activate it.
To install/activate Redis through cPanel you need to login to your cPanel hosting

Under WordPress Tools click on Redis.
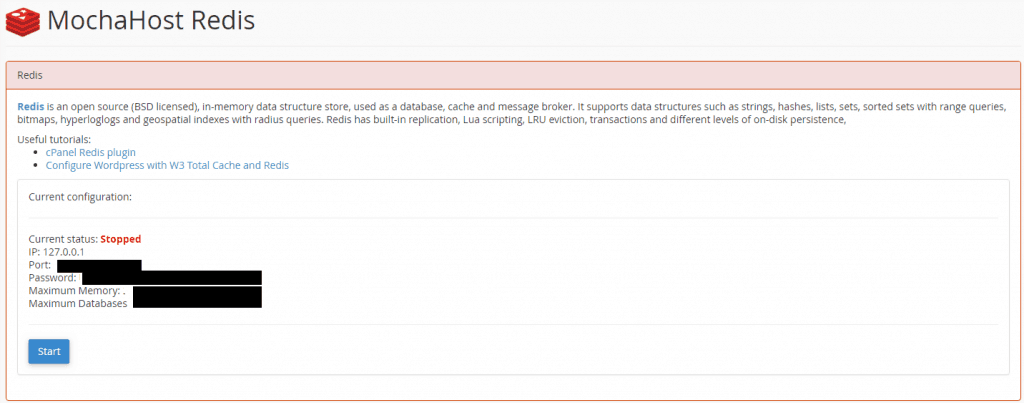
Click on the start button and Redis cache will be enabled on the server.
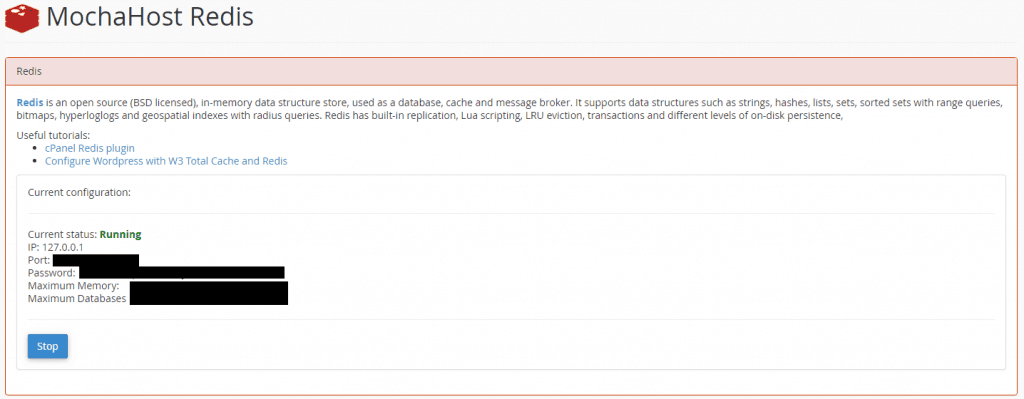
Now Redis in installed and enabled on your web hosting server. It’s time to configure Redis on WordPress website.
Configure Redis Cache on WordPress
In this tutorial, I will cover two different methods of configuring the Redis cache on WordPress.
Method 1 : Using W3 Total Cache WordPress Plugin
- Login to your WordPress Admin Panel
- Go to Plugins -> Add New
- Search for W3 Total Cache Plugin.
- Install W3TC (Disable any other caching plugins before you activate it)
- Activate “W3 Total Cache” by clicking on Activate button
- Go to Performance -> General Settings
- Then, scroll down to Page Cache to enable and select Redis for the Page Cache Method,
- Repeat this step for Database Cache and Object Cache also
- Go to Performance -> Page Cache -> Scroll down to the Advanced section and fill the Redis settings.
- Redis hostname: port / IP:port: IP Address and Port can be viewed from cPanel.
- Redis password: Password is stored in cPanel.
- Click on “Save All Settings”.
- Repeat the above steps for Performance -> Database Cache and Performance -> Object Cache.
Method 2: Using Redis Object Cache Plugin
If you are not using W3 Total cache plugin or object cache in W3TC plugin then I would recommend you to use Redis object cache plugin.
If in case you are using both the plugins then it is recommended to disable object cache in W3TC plugin using Redis.
Let’s now go ahead with configuring Redis object cache plugin. You will find many ways to configure this plugin but it didn’t work for me.
After lots of research I could finally managed to make this plugin functional.
- Disable W3TC object cache.
- Go To Plugins and search for Redis Object Cache
- Install & Activate Redis Object Cache Plugin.
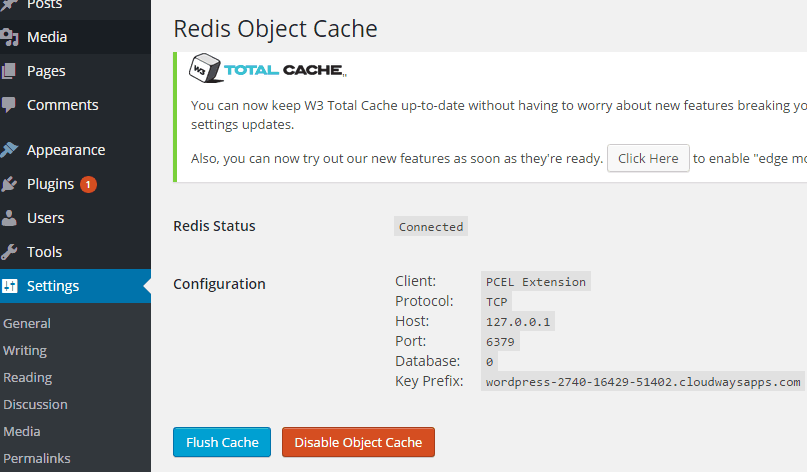
- After that go to Setting → Redis and Enable Redis Object Cache.
- The plugin should get connected with default configuration.
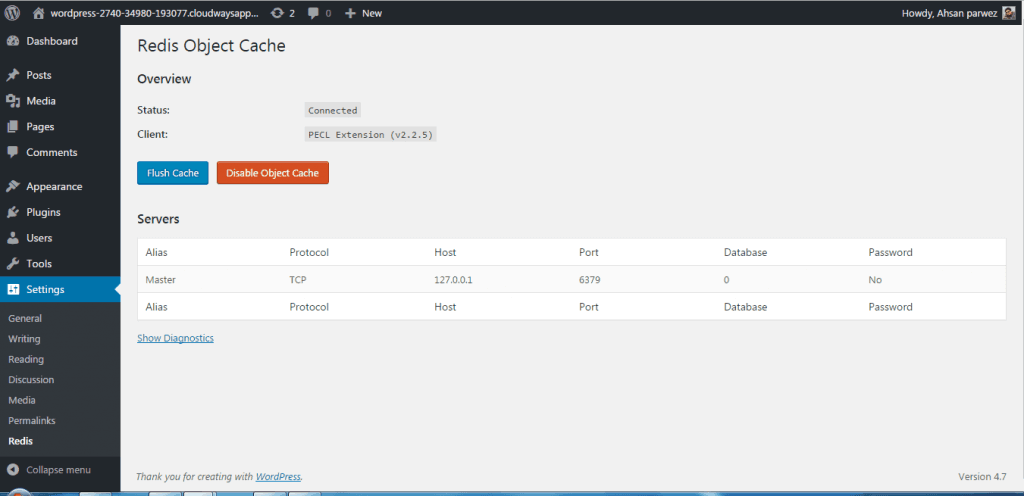
The above steps work fine when the default configuration of the Redis Object cache plugin matches with your server configuration.
In case the hosting server have the different configuration then you need to make some changes with in wp-config.php file.
- Find out the Redis server configuration like hostname, port, and password from the cPanel or from you hosting support staff.
- Go to file manager in the cPanel
- Take
backup of the wp-config file. - Open
wp -config.php file in the editor. - Add the following lines after Authentication Unique Keys and Salts.
/**#@+
* Authentication Unique Keys and Salts.
* Change these to different unique phrases!
* You can generate these using the {@link https://api.wordpress.org/secret-key/1.1/salt/ WordPress.org secret-key service}
*/
define('WP_CACHE_KEY_SALT', 'wordpress-2740-16429-51402.cloudwaysapps.com');
define('WP_CACHE', true);
define('WP_CACHE_KEY_SALT', 'bloggersutra.com');
6. To connect your Redis object cache plugin with the server add following line into wp-config.php file after define( ‘DB_COLLATE’, ” );
define('WP_REDIS_HOST', '127.0.0.1');
define('WP_REDIS_PORT', 'your_server_port_number');
define('WP_REDIS_PASSWORD', 'Redis_server_password');
define('WP_REDIS_DATABASE', 'number of database supported by your server eg:1');
Monitoring & Verifying Redis Cache
You can check via the command redis-
Conclusion
It is always important to speed up your website to rank better on search engines. Redis is a great caching solution for wordpress website to improve speed.
In this tutorial we have covered Redis cache server installation and configuration with Cloudways and mocha host.
But the fact remains the same with all other managed web hosting providers and cPanel hosting providers.
You need to activate the Redis cache and find
If you still find it difficult to integrate Redis cache on your website then do leave a comment on this article and we will help you.


