How to Get Started with Mobile Exit Intent on OptinMonster? Exit intent is the most awaited feature of OptinMonster. However, the feature is successfully launched and ready to use. This article will help you to set up mobile exit intent on OptinMonster.
Did you know that roughly half of all website traffic happens on mobile devices and nearly 80% of smartphone users have used their device to make a purchase?
It’s no surprise that mobile exit-intent is our most-requested feature. And, it’s available for OptinMonster users!
Exit intent is the technology that relies on the mouse activity to detect when a user is above to exit the website or the window. It is very common when it comes to accessing the websites on desktop PCs.
When a user points at the close button of the browser window the exit intent script is activated and thus showing a user a predefined content or offer to engage him on the website.
We all know that the search engine ranking of the website is also dependent on the time user spends on the website or how long the user is engaged on the website. So actually exit intent can increase the website engagement time of the user.
Also, you can offer a better deal or discount to the user while he is leaving the website. The exit intent can be configured for a particular post, category, or complete website.
So in this article, we will see how exit intent can be configured for mobile devices using OptinMonser. Before we proceed with the procedure it is important to know how the exit intent works for mobile devices.
How Exit Intent Works on Mobile Devices
Unlike desktop devices, the mobile devices send a different signal to know the user is above to leave the website. So once the signal is detected the exit intent script is activated and thus showing exit intent message to the visitor.
Firstly, let’s see these exit intent signals for mobile devices one by one.
Signal 1: When a User Presses The Back Button
The most common exit intent that is detected on the mobile devices while the user is browsing a website presses the back button to go to the previous website.
So whenever the user presses the back button, using the javascript an exit intent popup can be triggered to engage the user. The important point is the exit intent popup should be triggered when the user is pressing the back button to exit the website and not going the previous page of your website.
Signal 2: When User Scrolls Up
By default, the address bar of the mobile web browser disappears whenever the user scrolls down on the mobile to view the website content. Now, whenever the user wishes to exit the website he will scroll up to go to the address bar and enter the URL of another website.
So when ever the user scrolls up the exit intent script should be triggered.
Signal 3: When User Presses New Tab
Another exit intent is whenever the user presses the new tab on the mobile web browser. Pressing the new tab doesn’t actually mean that the user is leaving the website. He might return to your website after some time.
But it is also a type of mobile exit intent in which the script can be triggered to show the relevant popup to the visitor to increase engagement.
Whatever it may be but exit intent on mobile also plays an important role and should be used effectively to generate more leads and converting your visitors into customers.
What All Engagements Can be Shown Through Mobile Exit Intent
While showing the popup to the user on the desktop device or the mobile device the main purpose of showing the exit intent is to keep the user engaged on the website and convert him to your customer.
So what all are the important exit intents that can be shown to the visitor to keep him engaged whenever he plans to leave the website.
Here are some ideas you could try:
- A coupon that expires soon (like in the example from Electric Family below)
- A free shipping offer
- A chance to win something
- An exit survey to collect your visitors’ feelings towards your website
- Converting would-be abandoned carts
- Growing your email list
- Increasing revenue from affiliate marketing
- Boosting sales
There can be more ideas depending on the content of the website. But above are the major factors that attract and keep the user engaged.
Without wasting much of the time let’s now concentrate on creating the mobile exit intent on OptinMonster.
How to Get Started with Mobile Exit Intent on OptinMonster

Yes, now mobile exit intent is available on OptinMonster. Let me tell you I have been using the premium version of OptinMonster on my and my client’s website for last two years. The word for OptinMonster is an amazing WordPress plugin.
OptinMonste is the best WordPress plugin to convert and monetize your website traffic. It Instantly grows your email list, gets more leads, and increase sales. OptinMonster is actually the most powerful conversion optimization toolkit in the world.
OptinMonster comes in both free and premium versions. The premium version offers you lots of features to take your blog to the next level Whether you have a business website or SEO agency OptinMoster works for all.
I always recommend the premium version of the plugin to my readers and clients. To know more about the various feature offered by OptinMonster you must go through the in-depth OptinMonster Review.
To activate the exit intent feature on OptinMonster you must purchase the pro plan of the plugin. The Pro plan is available at $47/mo. However, as part of a special offer given to bloggersutra readers, you can avail it at $29/mo.
The plan comes with 14 days no question asked money back gurantee if you are not satisfied with the plugin. To activate the offer you just need to click the link below and the discount code will be applied. You don’t require any coupon code.
Get 50% Off on OptinMonster Pro Plan [Limited Time Deal]
Special Offer [12 May – 19 May 2020] – OptinMonster kicks off a huge sale for a good cause. A portion of every sale will benefit the charity No Kid Hungry (https://nokidhungry.com). To help make the biggest impact, they will be offering 30% OFF OptinMonster’s incredible set of features, including our newest solution: Mobile Exit Intent. APPLY COUPON CODE “KIDS” TO GRAB DISCOUNT.
Let’s now see the step by step procedure to get started with mobile exit intent on OptinMonster.
Step 1: Install and Activate the Plugin
OptinMonster can be easily installed like any other plugin through the WordPress admin panel. If you have any issues you can go through the step by step procedure to install WordPress plugins via various methods.
OptinMonster can be installed with simple steps:
- Login to your WordPress Admin Panel.
- Look for the Plugins menu at the left of the screen.
- Click on Plugins >> Add New.
- On the search bar type OptinMonster.
- Install and Activate OptinMonster Plugin.
The plugin which you installed is the free version and has limited functionality. You need to purchase the license to explore and use all the features.
Get 50% Off on OptinMonster Pro Plan [Limited Time Deal]
Now you need to activate the license to unlock the complete functionality of the plugin.
After the activation of OptinMonster plugins. Go to OptinMonster >> Authorization and connect to the OptinMonster account. Once you have done that you can see all the campaigns that you will create in the campaign tab.
From the campaigns tab you can activate or deactivate a particular exit intent.
You have now successfully installed and activated OptinMonster.
Step 3: Create Mobile Exit Intent
Now to create he first mobile exit intent you need to go to the OptinMonster admin panel on OptinMonster website.
By default dashboard will be opened. Here on the dashboard you can see the sites on which the OptinMonster is installed.
If you can’t find your website in the list you can manually add your site by clicking on “Create a new site” under the “Sites” dropdown on the left-hand side.
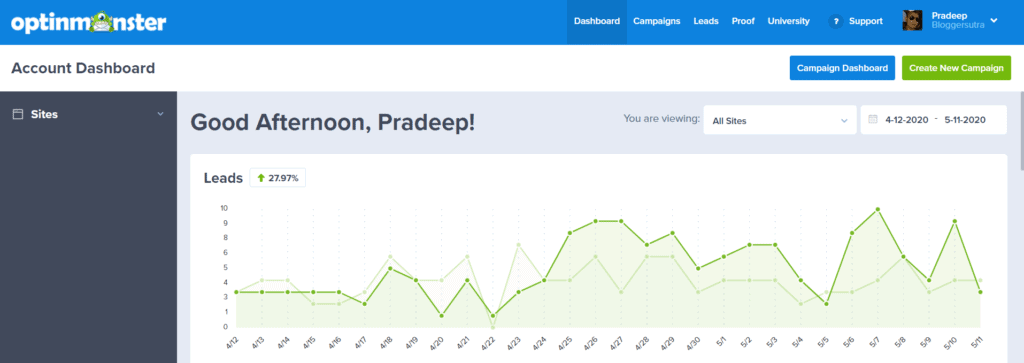
Now you need to create a new campaign for mobile exit intent. Click on “Create new Campaign” button on the right side of the screen.
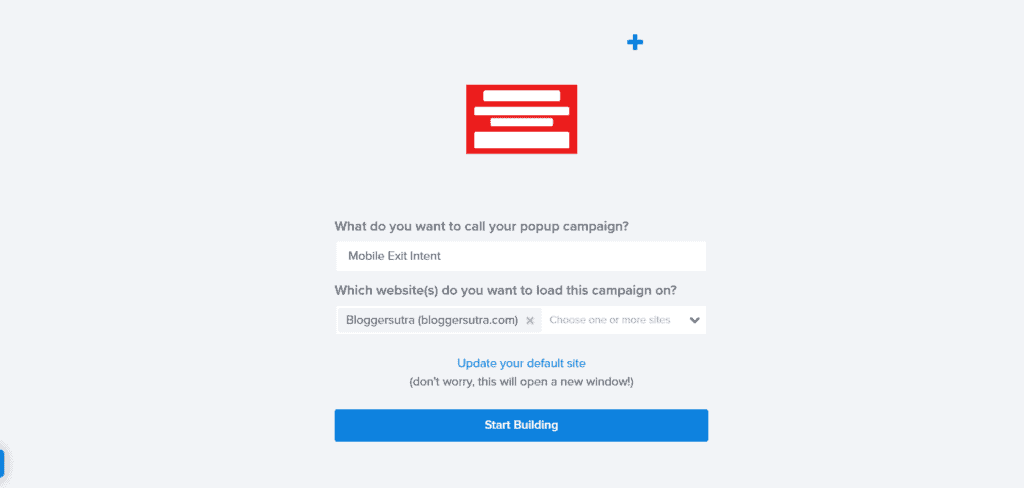
On the next screen you wil be asked to enter the campaign details like name and the website on which you want to run the campaign.
Note: You can run a single campaign on multiple websites. But all the websites should have the OptinMonster plugin installed and activated.
Once you are done with the details click on “Start Building“.
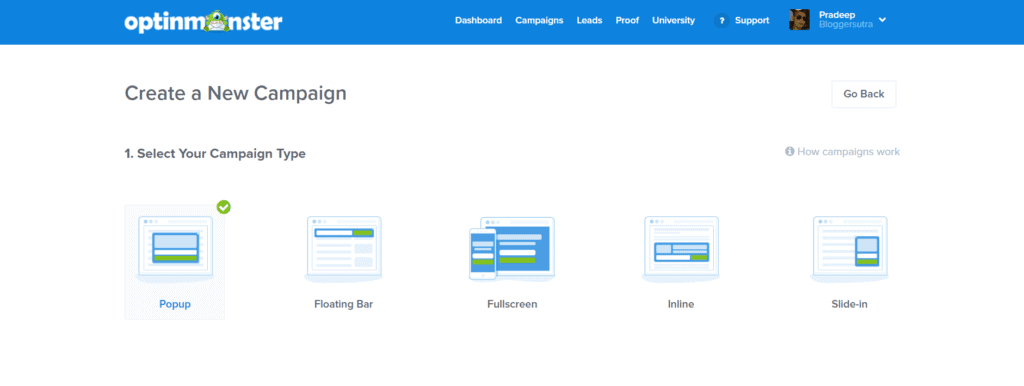
Selec tthe type of campaign you want to activate on your website. OptinMonster allows many options to setup your campaign according to your website requirements. The best part is that each campaign type comes with lots of professional prebuilt templates.
OptinMonster Campaign types:
- Popup
- Floating Bar
- Full screen
- inline
- slide-in
However, if you want to build your own template from scratch you can go ahead and do that too.
Here in this tutorial we will select the Popup campaign type. Once you selected the campaign type below you will shown the pre-built templates. Just select on of them.
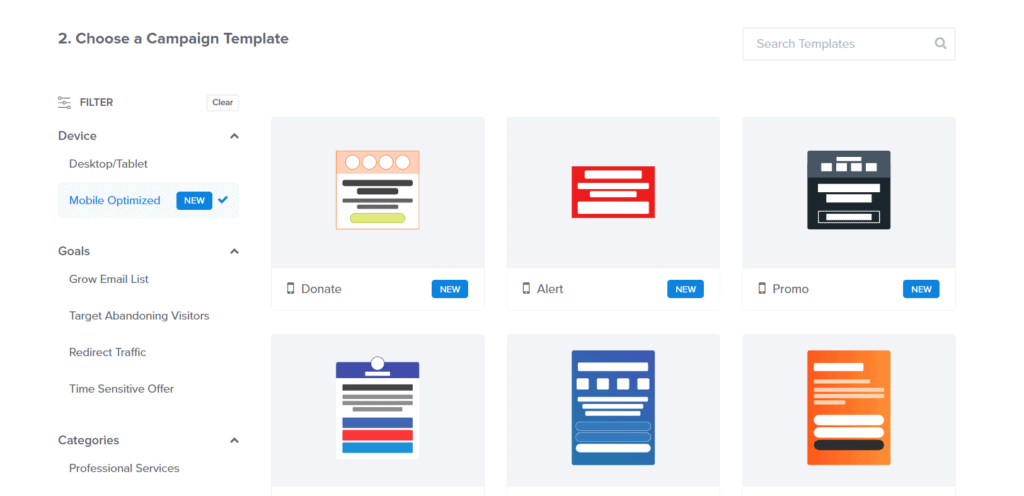
Since we are creating an exit intent for the mobile devices. You can select a Mobile Optimized template from theft hand side of the screen. Now from the list of mobile-optimized templates select any one of them and go to the next screen.
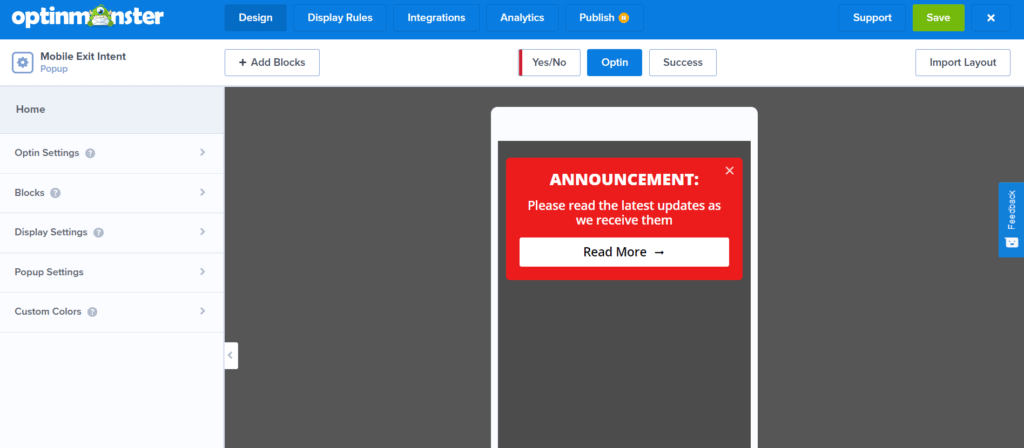
The template will be displayed with in the editor and you can make required changes to the template according to your requirements. By default OptinMonster offers you tons of features to edit the template.
Once you are done editing Click “Save” button on right top of the screen.
If you want you can also edit the success message for the template then click the Success button next to the Optin button on top. The success message is displayed whenever the user enters his details and clicks the submit button.
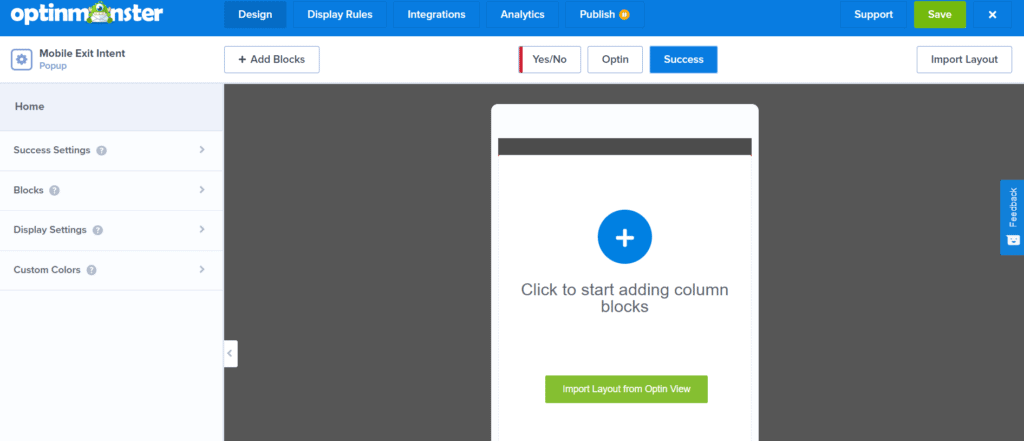
Once you are done with the settings “Save” them and click on “Display Rules” button on the top.
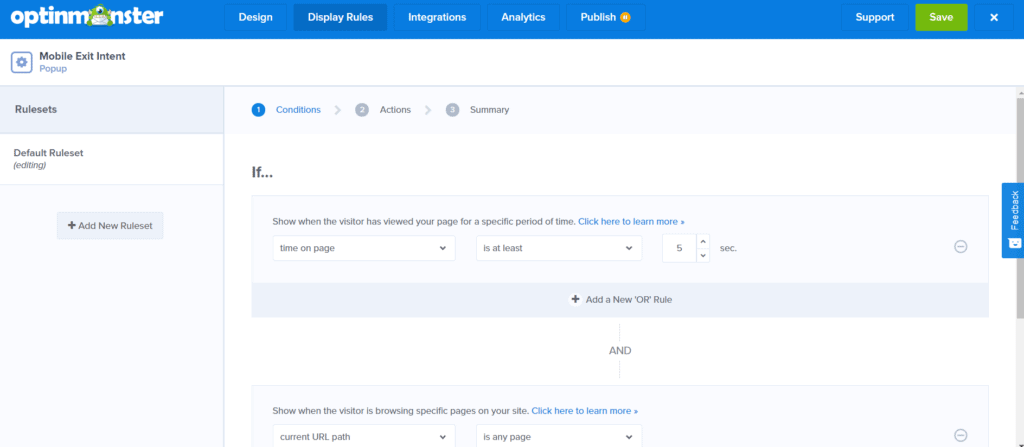
This is the main screen where you need to create the rule set for the mobile exit intent template. On the screen it is showing the default set of rules however, you need to create your own set of rules for mobile exit intent.
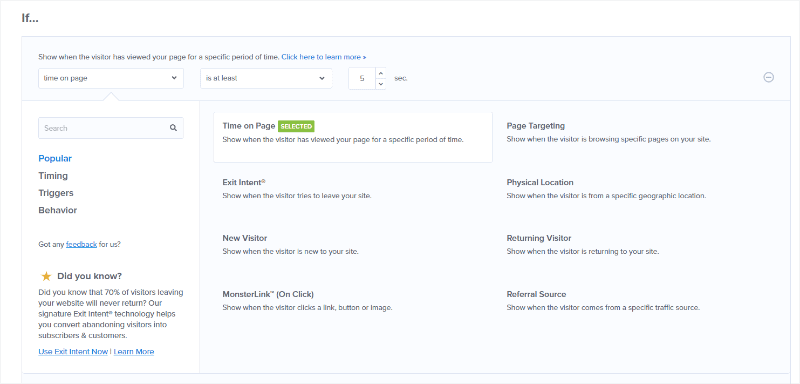
The new interface puts all the display rules at your fingertips in easy-to-understand sections with details about what the rule does right there.
So create you own rule for mobile exit intent and click the “Save” button.
Next you need to go the “Integrations” button on the top.
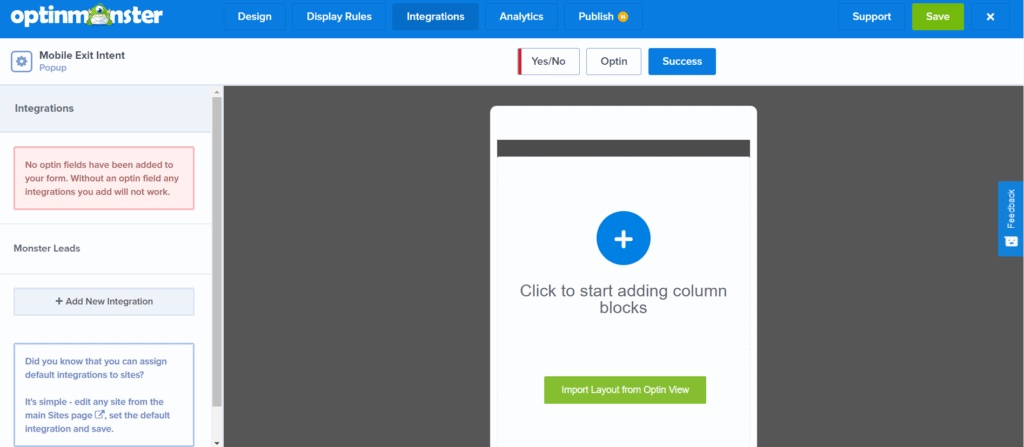
In this option you can integrate your mobile exit intent optin with third-party email integration services. OptinMonster supports multiple email networks that can be configured with few clicks. However, if you want to just save the leads with in the OptinMonster dashboard then select leads from the integration column.
Once you are done with integration click “Save” button and go to “Analytics“.
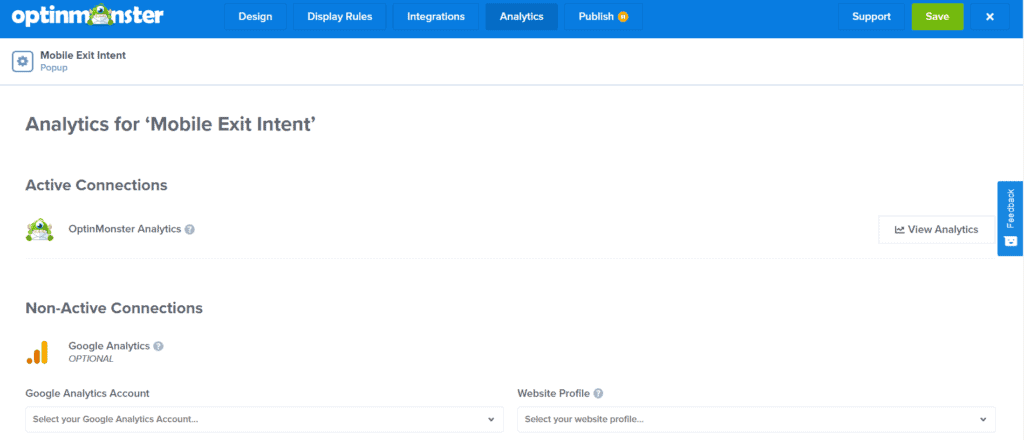
Here in this option, you can track the performance of your mobile exit intent with google analytics. So you just need to integrate with your existing Google Analytics account and click on “Save” button.
Next you go to “Publish“.
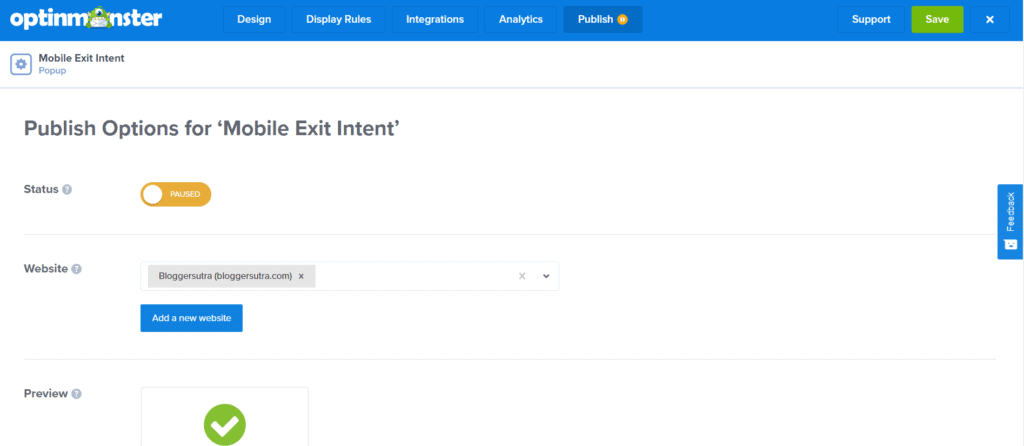
Here you can see the status of your mobile exit intent as “”Paused”. Just click on the button and make your mobile exit intent live on your website.
Now your mobile exit intent is configured and live. The next step is you need to go to the WordPress admin panel of your website for which you have created the exit intent.
Step 3: Activate Mobile Exit Intent From WordPress Admin Panel
Simply log in to the WordPress admin panel of your website and click on “OptinMonster” at the left sidebar of the admin panel.
Go to Campaigns >> Refresh Campaigns
Once you refresh the campaigns you will see your latest mobile exit intent campaign displayed on the list.
Under the Campaign click on the Enable button and your campaign is activated on your website. Clear the cache in case you have installed any cache plugin.
Finally, you are done with successfully integrating mobile exit intent campaign on your WordPress website.
Also Read,
- How to Track Lost leads and Reduce Form Abandonment in WordPress
- How to Accept Credit Card Payments on WordPress Site With WPForms
- How to Build a Successful eCommerce Website With WooCommerce
Wrapping Up
OptinMonster is a powerful enterprise-level technology to help businesses grow their customer base and revenue. Over a billion people see a website with OptinMonster on it every month.
I am also personally using OptinMonster on all my websites and my client websites. If you are really interested in taking your business then OptinMonster is a must-have plugin for your website.
Special Offer [12 May – 19 May 2020] – OptinMonster kicks off a huge sale for a good cause. A portion of every sale will benefit the charity No Kid Hungry (https://nokidhungry.com). To help make the biggest impact, they will be offering 30% OFF OptinMonster’s incredible set of features, including our newest solution: Mobile Exit Intent. APPLY COUPON CODE “KIDS” TO GRAB DISCOUNT.
If you have any doubts about integrating mobile exit intent on your WordPress website then feel free to ask in the comment section at the end of this article. We will be happy to help you.
Your suggestions are always welcome!
If you liked this article, then please subscribe to our YouTube Channel for WordPress video tutorials. You can also find us on Twitter and Facebook.


