Website owners feel difficult to link domain names and hosting via nameserver, hence they prefer to buy a domain name and website hosting from the same service provider.
Well, it is a fact that buying a domain name and hosting from the same service under one account is easy to maintain. Here the question comes – what if you are getting a different deal on the purchase of domain name from one service provider and hosting from another service provider.
Everyone wants to save money while purchasing things online. While we proceed further we will guide you to link domain name and hosting via nameserver on 1and1.com hosting account, so that you don’t miss any deal.
Here we will give you step by step procedure to link domain name and hosting via nameserver on 1and1.com hosting account. However, the procedure is the same for all the domain name providers.
After you have purchased the hosting service you will receive an email from your hosting provider giving your account login details. The same email will also have the details of the nameserver and IP address of the server where your hosting is configured.
How To Link Domain Name And Hosting Via Nameserver
1and1.com is providing a 1-year hosting service with a free domain name only at 0.99pm. If you have purchased a domain name and hosting from any other provider then do let us know the details of the deal in our comment section. We will be happy to add the deals on our website for our readers.
Also Read:
- Start your own e-commerce website with wordpress
- Create your own coupon/deals website with wordpress
- Make your own product comparison website with wordpress
- Start your own youtube like website with wordpress
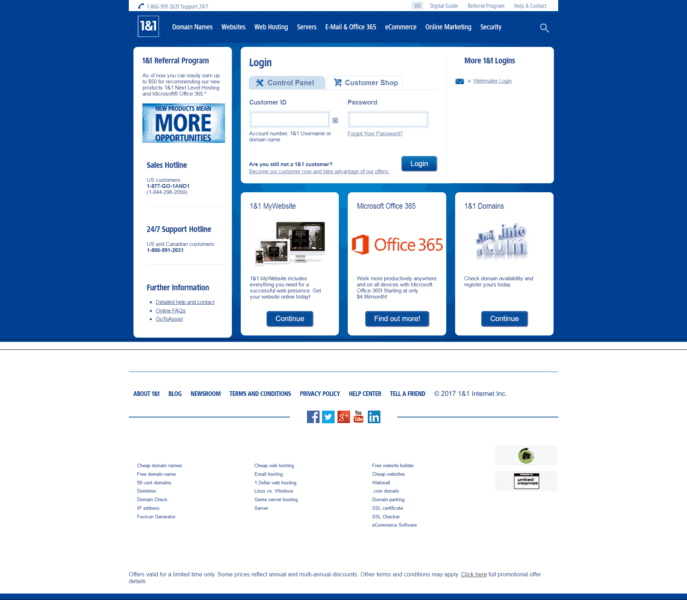
1. Login to your client panel
Login into our client panel from where you have purchased the domain name.
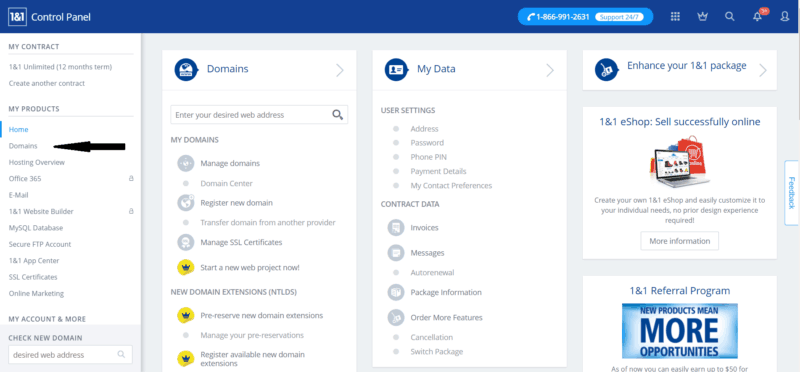
2. Go to the Domain Section
After logging in to your panel search for the domain option and go to your domain page where you will find the details of the domain name you have purchased.
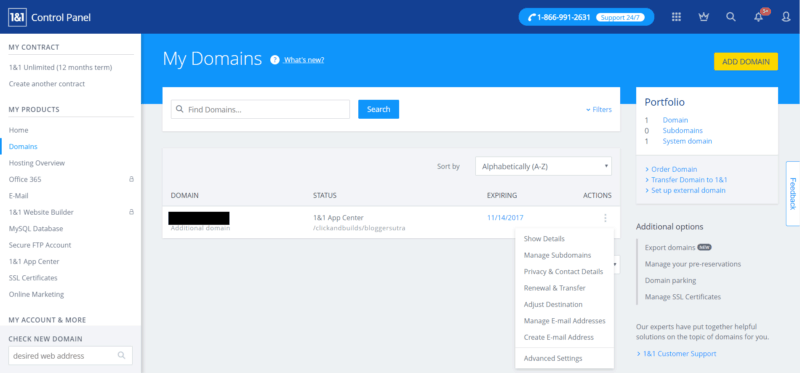
3. Go to settings
Now go for advanced settings or search for the DNS setting of your domain name. All hosting provider has their name server setting under DNS settings.
4. Check for name server
By default, your domain name will be directed to its own hosting server. You click on the edit button to change nameserver settings.
Once you have clicked on edit you will find options to edit your name server. Just enter the nameserver details (name or IP address) that you have received from your hosting provider via email.
If you are still not clear about the details of the name server you can drop an email to your hosting provider for nameserver and IP address details. After you have entered the details save the settings.
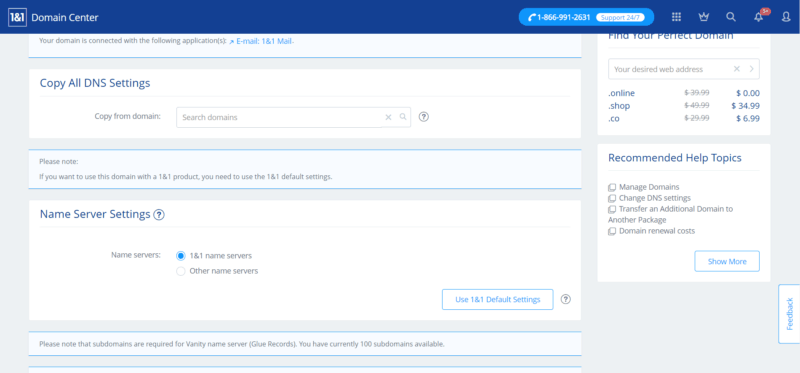
Please keep in mind it can take up to 24 hours to propagate details of nameservers linked to your domain over the internet. Once you have successfully linked your domain name to the hosting provider then you can go to your hosting control panel and install your script.
Go through our step-by-step installation guide for WordPress via various platforms.
If you still have any problem in ink your domain name to the hosting provider then please drop us a comment giving out details of your domain service provider. We will be happy to guide you in linking your domain name.
If you liked this article, then please subscribe to our YouTube Channel for WordPress video tutorials. You can also find us on Twitter and Facebook


