Have you ever seen attractive notification bars on websites and wondering how to create notification bars for your WordPress or WooCommerce websites?
Most of the notification bars offers the attractive deals on the website for their visitors. Notification bars are the best way to attract your visitors for some specific deal that you are running on your website to get more leads.
eCommerce websites are more focused to get more sales and hence use these notification bars in the best possible way to grab more users to check out their latest offers, new products, discounts, or coupon codes.
If you have still not started your own WordPress or WooCommerce website then this is the right time to do it. Bloggersutra goes offers a special deal for our readers where they can get 1 Year Premium Web hosting + Free Domain Name + Free Access to 4400+ Premium WordPress plugins and themes.
The premium hosting is offered by HostArmada (Fastest Growing Web Hosting). You can read the detailed review before grabbing the deal.
- Read In-depth HostArmada Web Hosting Review
Having said that, notification bars or banners are the effective way to boost traffic and revenue for your website.
There are lots of tools available on the internet which offer attractive notification bars for your WordPress and WooCommerce website. But most of them are not optimized and make your website page slow. Thus slowing down of website lets you loose revenue on your website.
So from all notification bar tools, you must select the best one for your website which is fast, secure, and doesn’t come heavy on your pocket.
One such tool that we also used on our websites and also on our client’s websites is OptinMonster. With the right tool, you can add these notification bars to your website quite easily.
So before we proceed further with the tutorial for creating notification bars on WooCommerce websites, it’s important to know what exactly is notification bars and what are its benefits.
Let’s find out, shall we?
What is Website Notification Bars?
Website notifications bars are the promotional banners that are placed either at the top of the website or at bottom of the website. It mainly houses the latest deals or new content on the website that the website owner wants to promote all over the website.
With plugins like OptinMonster the notification bars can be displayed on a particular page or category over the website. You can also display notification bars depending on the various exit-intents.
Most of the websites use notification bars to convey –
- New offers,
- New products,
- Changes in the services,
- Limited period services or anniversary deals, and more.
Users can either click on the notification bar to get redirected to the offer page or simply click on the “X” button on the extreme corner to close it.
Benefits of Website Notification Bars
Website notification bars can do wonders if used correctly. It can get you more leads and thus boosting your revenue.
There are tons of benefits of using notification bars, but let’s concentrate on important ones:
- Web alert bars can be used to redirect users to the desired page, thus saving lots of user efforts.
- Website notification bars are the fastest method to deliver promotional messages to your readers.
- Improves sign up for your mailing list.
- Better chances of recommendation by your existing customers to new users.
- Decreases the bounce rate on your website, as your customers will be engaged in reading the latest offers.
- Users are more comfortable as website notification doesn’t ask for personal details.
Now it is very much clear that website notification bars forms very important part of your website and is must to take your business to the next level.
Now let’s see How to Create Notification Bars for Your WooCommerce Website.
Steps to Create Notification Bars for Your WooCommerce Website
OptinMonster is the most powerful conversion optimization toolkit in the world which helps you to Instantly grow your email list, get more leads and increase sales.
Creating notification bars for WordPress and WooCommerce website is just a feature of OptinMonster. Below are the steps to create a notification banner for your site.
OptinMonster notification bars can be easily customized depending on the theme of your website. Hence it will merge with your website theme to give a better appearance to your users.
Let’s proceed with the steps to create notification bars using OptinMonster.
Step 1 – Login to OptinMonster Account
If you are regularly following our blog then you must have purchased OptinMoster Premium version (We recommend to all our readers) and configured it on your website. If you have still not purchased it the click the link below to get 60% off on all OptinMonster Plans (only for Bloggersutra readers).
Get 60% off on OptinMonster Premium Plans
Once you have purchased the plan according to your website requirement, it’s time to configure it. Simply follow the step-by-step guide to configure OptinMonster from scratch.
Now since we are on the same platform let’s continue with Creating Notification Bars for Your WooCommerce Website.
Firstly, you need to login to your OptinMonster Account
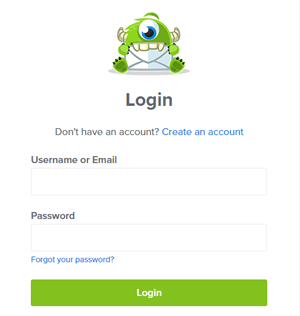
Just enter your email address and password that you have used during you account creation.
Step 2 – Create New OptinMonster Campaign
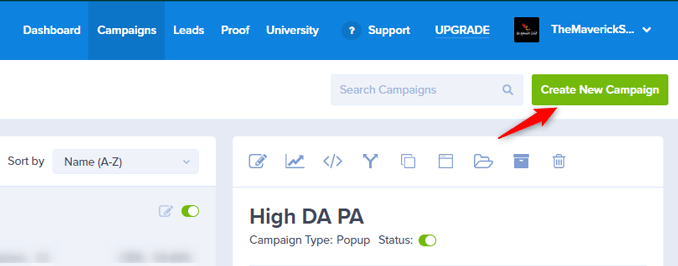
OptinMonster campaign can be simple created by clicking on the Create New Campaign button appearing on top right corner of you account dashboard.
Step 3 – Select the Floating Bar Campaign Type
For creating notification bars you need to choose the Floating Bar from the campaign types.

Step 4 – Select Notification Bar Template
OptinMonster offers lots of pre-designed templates that can be directly configured on your website. On top of that, it gives the flexibility to make necessary changes from your editing dashboard as per your website theme.
So now choose the template as per your requirement.
Note – OptinMonster offers over 50 pre-designed templates to create website banner alerts. Get All OptinMonster Templates Now
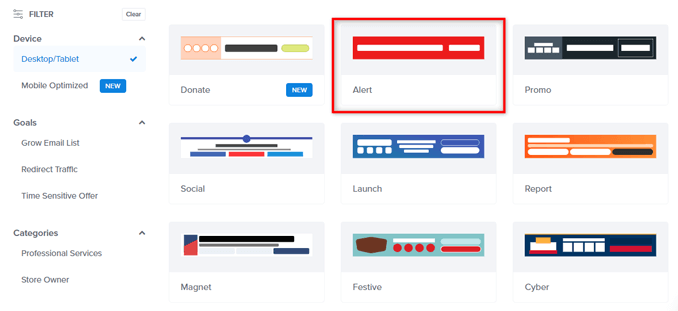
For the purpose of the tutorial, we are using the Alert Template. However, you can see another notification bar template that is currently live on our website. The necessary changes have been made to the template to merge with the website theme.
And, if you don’t find a suitable website notification bar template, you can always create a website alert bar from scratch and customize it to shape your idea.
Step 5 – Name Your Campaign & Select Website
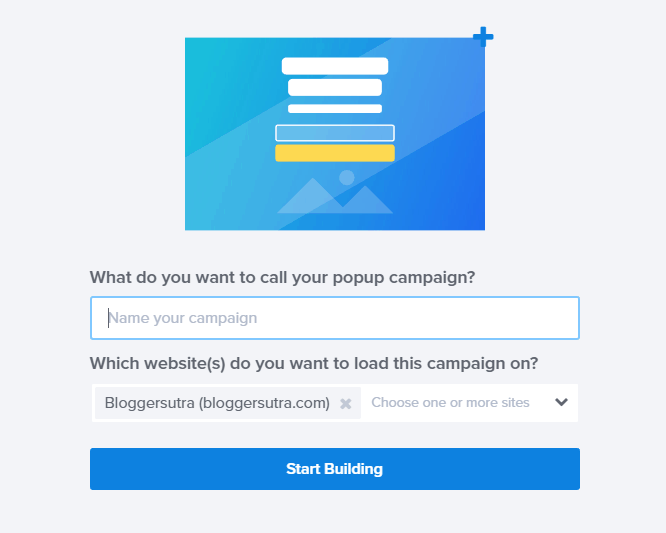
You can simply enter the campaign name. But the campaign name should be in a way that you can recognize its purpose in the future once you have deactivated it.
Next, you can select the websites on which you want to display the notification bar. You can select a single website of multiple websites if you want the same notification bar campaign to be displayed on all the websites.
Step 6 – Edit Campaign Settings
Once you have setup your campaign, now it’s time to configure your notification bar using the OptinMonster editor. Using the editor you can modify the following settings:
a. Notification Bar Position
To change the position of your alert bar, Go to Floating Settings, and turn on the toggle switch appearing in front of Load Floating Bar at Top of Page

b. Edit Text of the Notification Bar
Next, you need to change the content of your campaign.
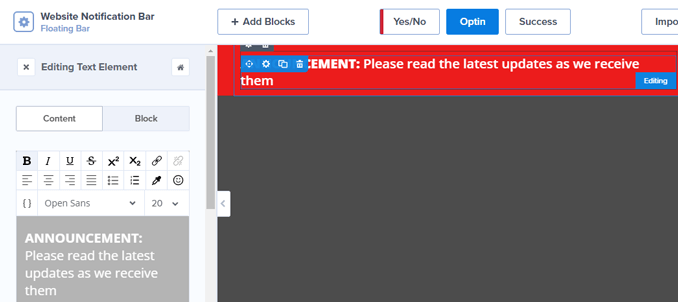
The text can be easily edited by clicking on it. Once you click on the text the respective text editor will open to make and save the necessary changes. You can also, edit the text color, size, fonts, and other parameters.
c. Edit Button of the Notification Bar
Just like content, all you need to do is to click on the button to modify the button text, width, alignment, color, icon, icon spacing, etc.

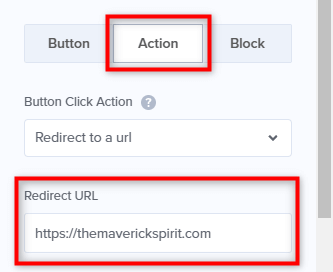
Make sure you change the action URL of your campaign from button settings.
Step 7 – Change Display Rules for Notification Bar
This is the important configuration which helps you decide the time and factor by which you notification bar should be displayed to your readers.
Go to Display Settings appearing at the top menu and change time on page to is immediate.
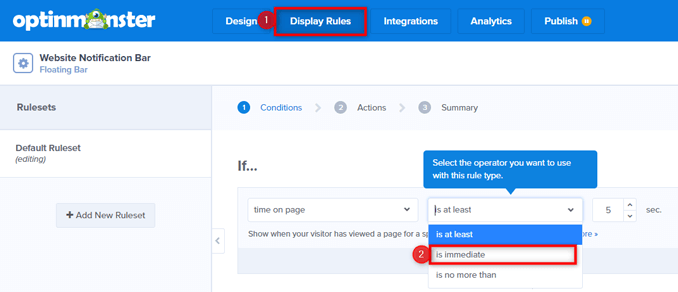
This small change will improve the user experience of your website’s notification bar. Apart from this OptinMonster allows you to create various rulesets to decide how your notification bar will be displayed to users.
It also allows you to decide the page or category on which the notification bar will be displayed.
Step 8 – Save & Publish the Campaign
Next, you need to save your campaign.

Lastly, you need to click on the Publish button and then toggle the status to Live to make the campaign live.
Before you make it live you can integrate the campaign with your Google analytics account of your website to track the campaign performance directly from your Google analytics.
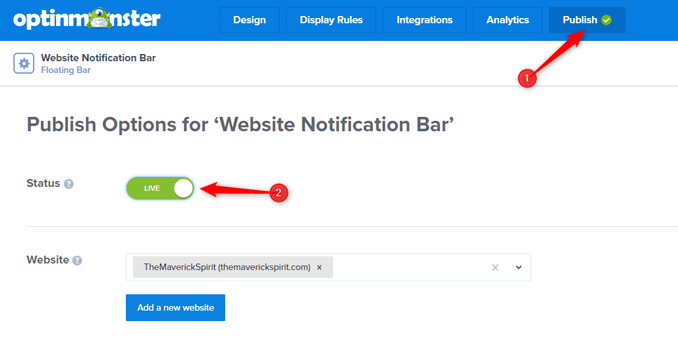
Now sice the campaign is fully live its time to get it activated through your WordPress or WooCommerce website.
Step 9 – Activate Campaign on WordPress/ WooCommerce
To activate the campaign on your WordPress website, Go to the WordPress admin panel and select on OptinMonster tab on the left.
Refresh the list of the campaign and you will see your latest campaign within the list.
Click on the “Go Live” button to activate the campaign on your website. OptinMonster campaign created by you is now live on your website. You can simply open the page as per your display rules and you will see the opt-in form.
In case you don’t see the opt-in form you can clear the cache and try again later.
If you want to deploy the form on a non-WordPress website, you can quickly copy the relevant code from your account area on the OptinMonster website.
Note: There’s a bunch of handy online documentation covering all of the most popular publishing platforms, as well as general instructions for other types of websites.
You can also refer the video created be OptinMonster team for creating your successful campaigns.
Step 10 – Have Final Look of Notification Bars for Your Website
Though OptinMonster gives you the flexibility to integrate a single campaign into multiple websites. In this case, we have activated the same campaign on two websites, out of which one is a WordPress website and another one is the WooCommerce website.
Lets have a look of the web notification bar on both the websites.
a. Notification Bar on WordPress Website
Here is the reference image on how the web alert bar will look on your WordPress website.
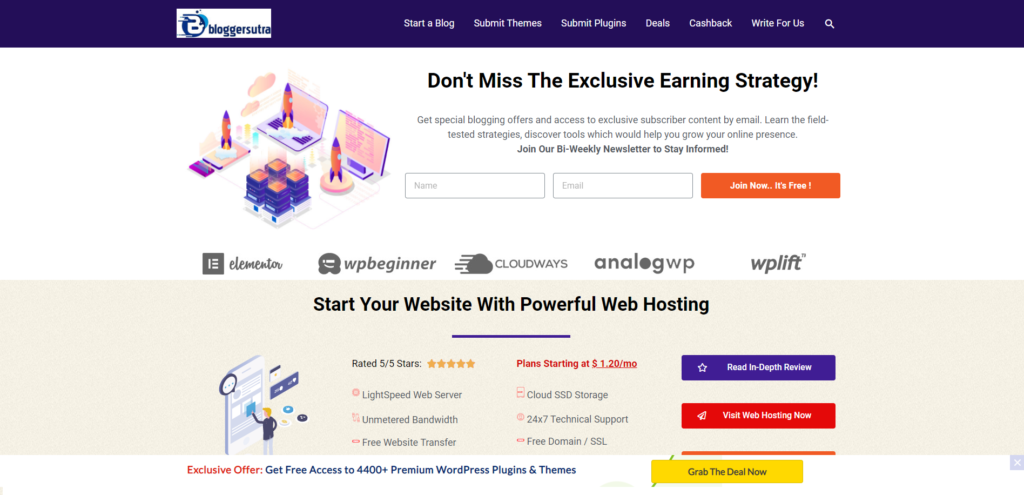
b. Notification Bar on WooCommerce Website
Here is the reference image on how the web alert bar will look on your WordPress WooCommerce website.
We have witnessed that the how the notification bar looks on WordPress and WooCommerce website. Also, it can be easily displayed either on the top of the page or bottom of the page.
Visit GPLdownload.com and get access to 4400+ WordPress GPL Plugins and themes.
Let’s see best examples of the website notification bars.
Best Examples of Website Notification Bars
Here are some examples to help you get started.
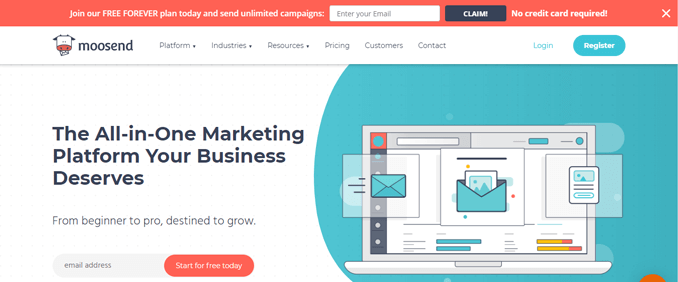
1. Moosend
This example is the email campaign to claim the offer. The notification bar shows the new offer which can be claimed by user by simply entering his email address.
This method will serve two purposes. One is adding new emails to the mailing list. The second is to analyze how many people are interested in the service.
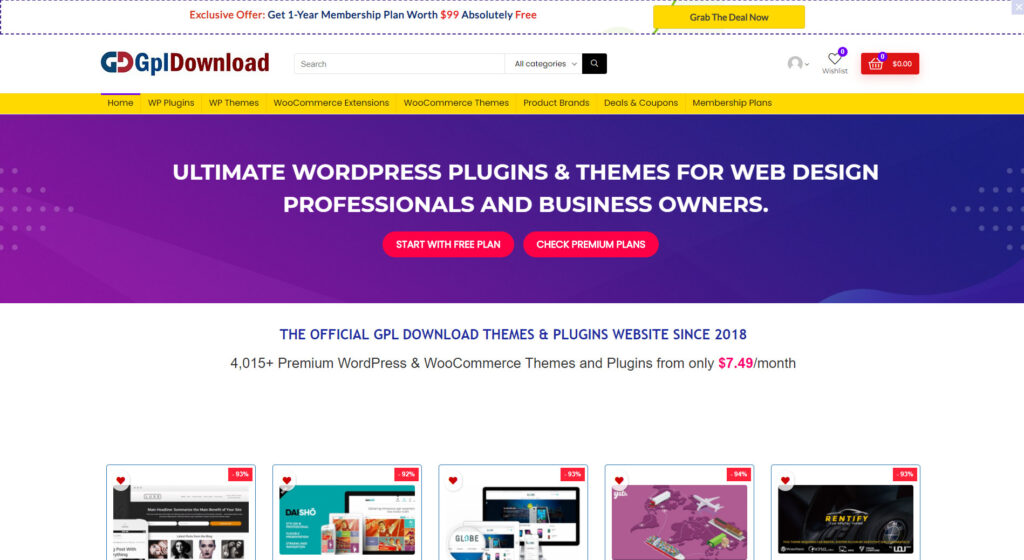
2. GPLDownload
This the second example where the notification bar is displayed on the top and having a button which will redirect the users to the offer page of the website.
Here you can promote a specific deal where the visitors need to redirect to another page of the same website or another website. Using this notification bar you can also display a simple coupon code on your website for better results.
Final Words about Creating Web Alert Bar in WordPress/ WooCommerce
Notification are are must for every website and must be configured properly depending on the deal that you are offering to your visitors.
The notification bar should be:
- Easily spottable by users.
- It should be eye catchy revealing exciting offers.
- It should navigate the user to the landing webpage via a call to action.
There are many tools offering multiple ways to design the creative notification bars on your WordPress website. But most of them will make your website slow and non-responsive.
You might already have a marketing plan for your website including emails and social media.
But adding these notification bars/banners to your website will definitely boost your marketing campaign. We are personally using OptinMonster on our websites and never faced any issues.
If you are looking to take your marketing campaign to next level to get more sales and leads then OptinMonster is the tool for you.
Also Read, How to Create Coupon Wheel Optin Campaigns in WordPress and WooCommerce
If you face any difficulty while grabbing the deal then feel free to comment at the end of this article and we will be happy to assist you.
“Sharing is Caring: Please support us by sharing it with your friends and on social media”
If you liked this article, then please subscribe to our YouTube Channel for WordPress video tutorials. You can also find us on Twitter and Facebook.


