Building a sales funnel in WordPress is a crucial marketing strategy for any eCommerce company. Potential customers that you might be losing out on if you haven’t done so. But if you’re unfamiliar with this approach, achieving this with WordPress requires building a number of crucial pages and anticipating consumer behavior, which can be challenging.
Fortunately, creating a compelling sales funnel that converts leads into loyal clients doesn’t require any coding knowledge. You only need a few plugins, a carefully thought-out customer journey, and of course, your product if you already have a WordPress website. If you still don’t have a WordPress website then follow the simple tutorial to start your own WordPress website from scratch.
This article will define a sales funnel and demonstrate how to create one on a WordPress website. Let’s start now!
What is a Sales Funnel and Why You Need it?
A sales funnel essentially represents the customer’s path from their first interaction with your business to their final purchase. Its main objective is to turn leads into customers, which you can accomplish by enticing them to follow a set of instructions.
You might employ various kinds of sales funnels. The Self-Liquidating Offer (SLO) funnel is the most popular. It’s designed to focus on three objectives: generating leads, closing deals, and recovering your expenses. ‘Next-offer’ funnels, which produce leads with free offers, are also popular. It then entices them to advance to a paid entry-level offer and so forth.
Your sales funnel’s specific processes may change slightly based on what you’re offering. However, it essentially falls into four categories:
- Awareness: A lead must first be introduced to your brand. They could come upon your goods via a Google search, a social media advertisement, or any other number of marketing channels.
- Interest: The lead moves on to the next level of the funnel if they are interested in your offer. They can find out more about your particular product or service and their purchasing options here.
- Decision: The lead will eventually decide whether or not they want to purchase your good or service. Ideally, they’ll put it in their online shopping basket and finish the transaction.
- Action: The lead successfully completes the checkout process and becomes a paying client.
You can create landing pages, enhance the user experience (UX) of your Checkout page, and do other things to make it easier for leads to proceed through these stages. You can boost your conversions, revenue, and even brand loyalty by actively nurturing leads as opposed to just leaving them to their own devices and hoping for the best.
Why Use WordPress?
Numerous companies will offer to create your sales funnel for you. At first glance, this can appear like a wise choice. It may be difficult to combine with the other tools you’re using, and it only gives you a limited amount of flexibility over your funnel.
Instead, the WordPress platform makes a fantastic base for your sales funnel. Maximum flexibility and control over every facet of the process are provided. Using plugins, you may also simplify and automate certain aspects of your funnel.
What Will You Need to Build a Sales Funnel in WordPress
You must lay the groundwork for your WordPress sales funnel before you begin to construct it. In order to use WordPress, which is self-hosted software, you must register a domain and purchase web hosting. Additionally, WordPress itself needs to be installed and configured.
You can then choose a WordPress theme. To ensure that your landing pages load quickly, they should be both lightweight and simple to manage and adjust.
Then you’ll need a couple more fundamental components. Included in this is the good or service you want your leads to buy. Additionally, you need to provide compelling content that moves prospects through the conversion process.
To set up an effective sales funnel in WordPress, you’ll need:
- Fast Web Hosting. It’s a good idea to host your website with an eCommerce-friendly provider who can handle sudden traffic spikes. We recommend Rocket.net WordPress managed hosting and InMotion hosting or Interserver hosting in case of shared hosting.
- Lightweight Theme. Speed is essential for boosting conversion rates. Your potential clients may leave your site if they take too long to load. Choose a lightweight and fast WordPress theme like Astra Theme for your WordPress website.
- WooCommerce: The most popular eCommerce plugin for WordPress, and a simple easy-to-use solution.
- Elementor: A flexible page builder that can help you design your site without code.
- CartFlows: A free funnel-building plugin with plenty of options.
- Leadpages: A premium funnel-building alternative for larger businesses.
- Payment Gateway. In order to allow clients to make payments online, you must also install payment gateways to your website. In most cases, your eCommerce plugin will take care of this.
How to make a sales funnel in WordPress
After talking about how crucial it is to have a sales funnel for your eCommerce website, let’s examine how to create one using WooCommerce and CartFlows. The methods listed here should apply to any eCommerce site, so feel free to modify them to better suit your specific store’s offerings.
Step 1: Install Essential Plugins and Add Your Products
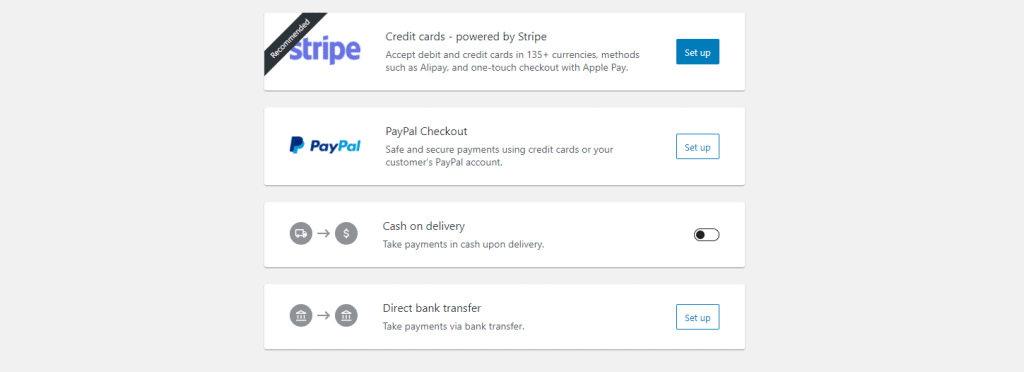
Get WooCommerce installed and activated if you haven’t already. To add your online store information, delivery choices, and payment methods, follow the setup wizard’s instructions:
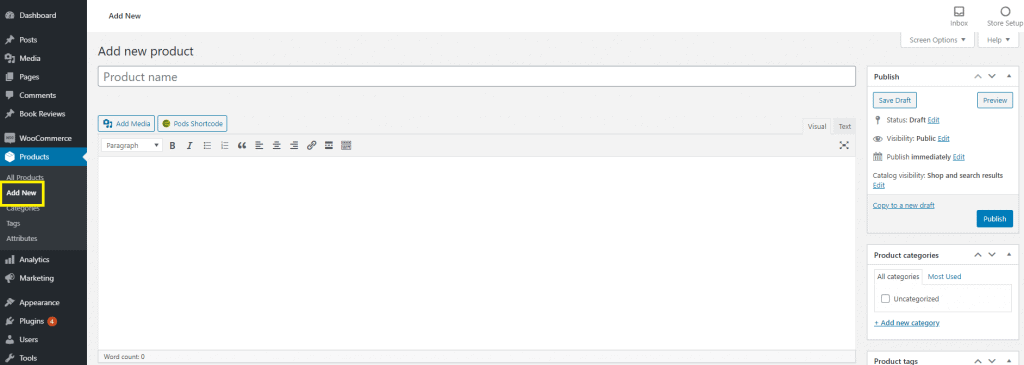
Once the setup is complete, select Products > Add New and enter the information for the product you want to add to your sales funnel. For any additional products you intend to offer, repeat this procedure:
Check out our comprehensive WooCommerce guide if you need additional assistance with the first phases of building your eCommerce website.
Install and activate CartFlows once your online store is operational. Additionally, it has a setup wizard:
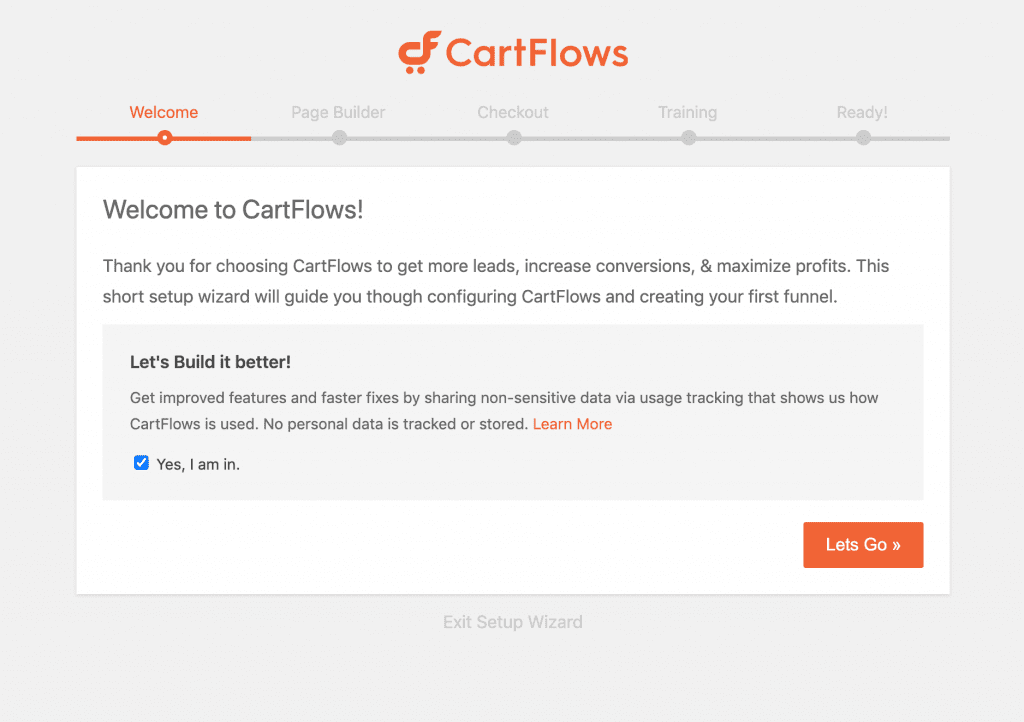
Choose a page builder from the dropdown menu at the appropriate stage if you intend to use one. Alternately, you can decide to stick with the Block Editor by choosing Gutenberg.
Step 2: Design a Converting Landing Page
The landing page for your product is what you’ll need next. This particular kind of material is made to convert website users that land there at the ‘interest’ stage of the sales funnel. They probably came across one of your marketing initiatives and are now looking for further details.
Go to CartFlows > Flows > Add New to construct yours. From the available funnel templates, which you can subsequently modify, you can choose:
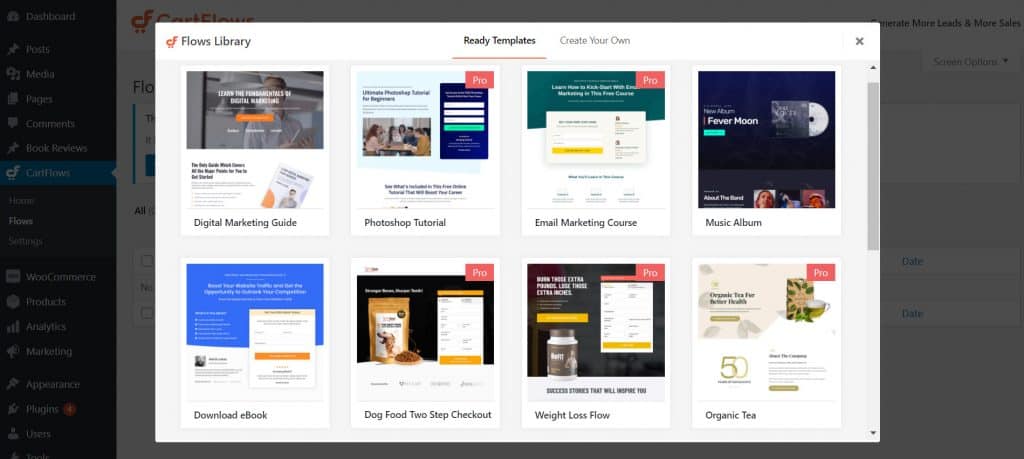
Only templates (referred to as “flows”) that are appropriate for the page builder you choose when configuring the plugin will be shown by CartFlows. Once you’ve chosen one you like, click Import to get the flow editing area.
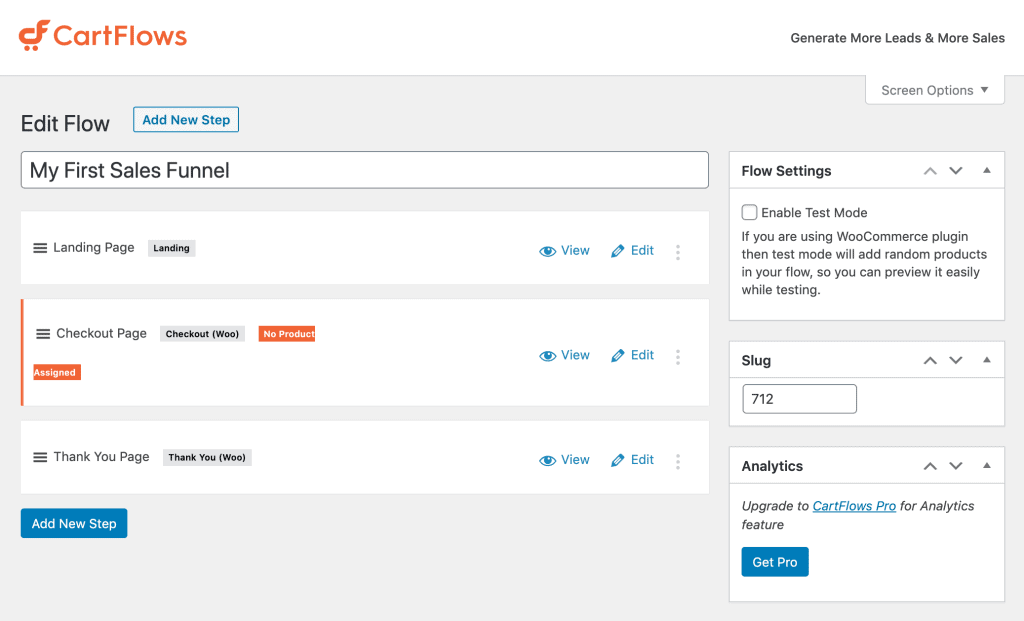
Keep in mind that we chose a template for this example that has a landing page, a checkout page, and a thank-you page. You may always select Add New Step to start over if your template doesn’t already have one or more of these pages.
For the time being, we’ll use the default Block Editor to modify the landing page of our template. To access the page editor, select Edit:
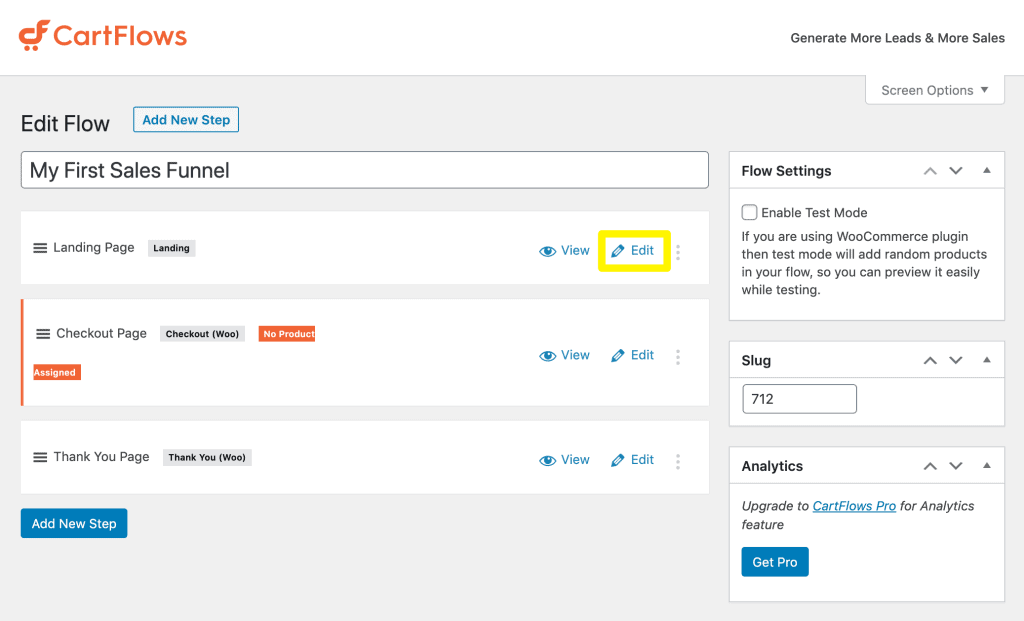
You can use the page builder you choose in the CartFlows setup wizard to replace text and pictures as well as move, add, and delete objects in this area. Include a compelling value proposition and a strong call to action (CTA). Remember to save your modifications!
Step 3: Create checkout and Thankyou Pages
After that, return to your Flows screen and carry out Steps 2 again for your Checkout and Thank You pages (or any other content included in your template). Although this is quite simple, there is a special step you must carry out for your Checkout page.
You may have noticed in the flow editor that your Checkout page has a label that reads No Product Assigned:
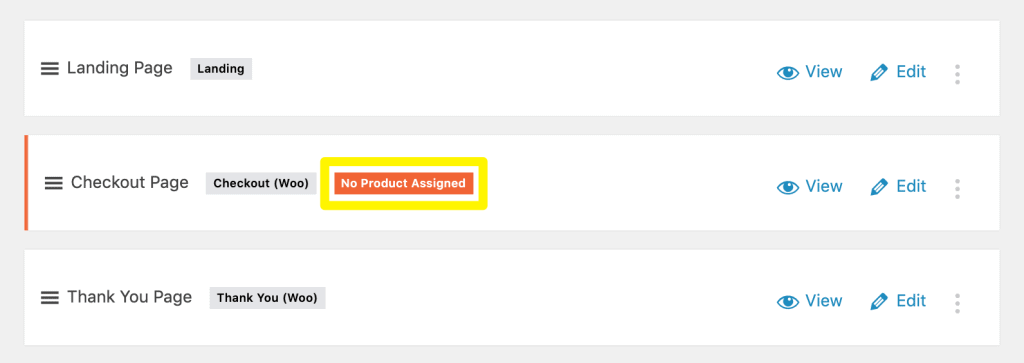
If you click on Edit and scroll down, you’ll see a section labeled Checkout Settings where you can link a specific product to this page:

You can find comprehensive documentation for each of these options in CartFlows.
Your thank-you page should serve two purposes: to confirm that customers have finished their purchases and to reassure them of their importance in the process of fostering brand loyalty. You might also want to include another CTA pointing customers to any necessary next steps, such your upsell page or social media accounts.
Step 4: Add Upsell Pages
You might view your sales funnel as finished at this point. However, returning consumers are extremely beneficial to your company. In order to start building a long-lasting relationship (and future purchases) with customers while they are already on your website, you might want to drive them to an upsell page.
For instance, if your lead recently registered for a webinar on “Marketing 101,” you might provide them a discounted copy of the eBook “Introduction to Marketing”:

You can use layouts that feature upsell pages if you upgrade to CartFlows’ premium edition. If not, you can always start from scratch by clicking Add New Step in the flow editor.
Step 5: Channelize leads to Your Sales Funnel in WordPress
Finally, you’ll be able to join the pages you just built by connecting the dots between them. By default, CartFlows will lead visitors to pages on your website in the order that was predetermined in the flow editor.
The sample we’ve used throughout this course, for instance, begins with a landing page and moves on to the checkout and thank you pages. You can use the Add New Step button to add more steps and change the order of those steps in the flow editor as you see fit.
You only need to start sending traffic to your landing page through your marketing channels now that your sales funnel has already been established. As users click on your CTAs and finish their purchases, they will be immediately redirected to your custom Checkout and Thank You pages if they are interested in the product you assigned to this flow.
Final Words
You now have a thorough understanding of sales funnels and how to use them to improve your own WordPress store. If you really want to take the business to the next level then you must set up sales funnel for your WordPress website with CartFlows.
Sales funnels are efficient tools for leading potential customers to make a purchase. When we shop online, we frequently pass through them without even noticing it.
You may better understand sales funnels and maintain the health of your store by learning how your customers think, how to create landing pages, and how to keep customers after they’ve gone through the sales process.
Sales funnels and marketing are important subjects. Have we overlooked something crucial? Comment below with your thoughts and let us know.
