This Hostinger tutorial tells you how to Create a Blog in WordPress Step By Step. In my previous article, I mentioned about the various Hostinger plans, coupons, and promo codes. If you have still not bought your web hosting then grab a special discount on hosting with a free domain name.
Hostinger is the fastest growing web hosting provider with almost crores of websites hosted on their servers. When you are going through this guide you will be amazed to know that bloggersutra.com is also hosted on Hostinger.com
Frankly speaking, I am actually happy with Hostinger’s service and customer support. Their easy-to-use control panel makes it more user-friendly and easy to manage.
(Use Coupon Code BH07)
I am recommending Hostinger to my readers due to certain customer support issues faced by me personally while hosting bloggersutra.com with Bluehost.
This tutorial will guide you in installing and setting up your first WordPress blog with Hostinger. It was easier to create the tutorial as bloggersutra is already hosted with them.
Hostinger Tutorial: Start Your WordPress Blog
Step 1: Go to Hostinger.com and click on Login Button in the top right corner.

if you have still not purchased Hostinger web hosting then here is a special deal for you.
Step 2: Enter your account username and password that you have set while purchasing a domain name. Remember your username will be your registered email id that you provided during registration.
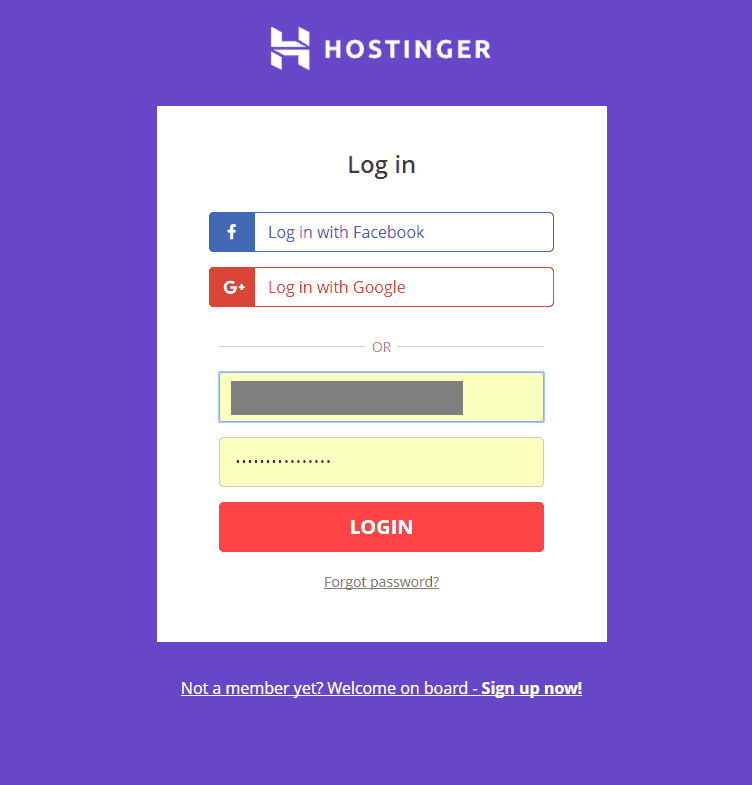
If you have forgotten your account password you can simply click on the forgot password link and enter your registered email id. You will get the password reset link in your email.
Click on the reset link inside the email and reset your password.
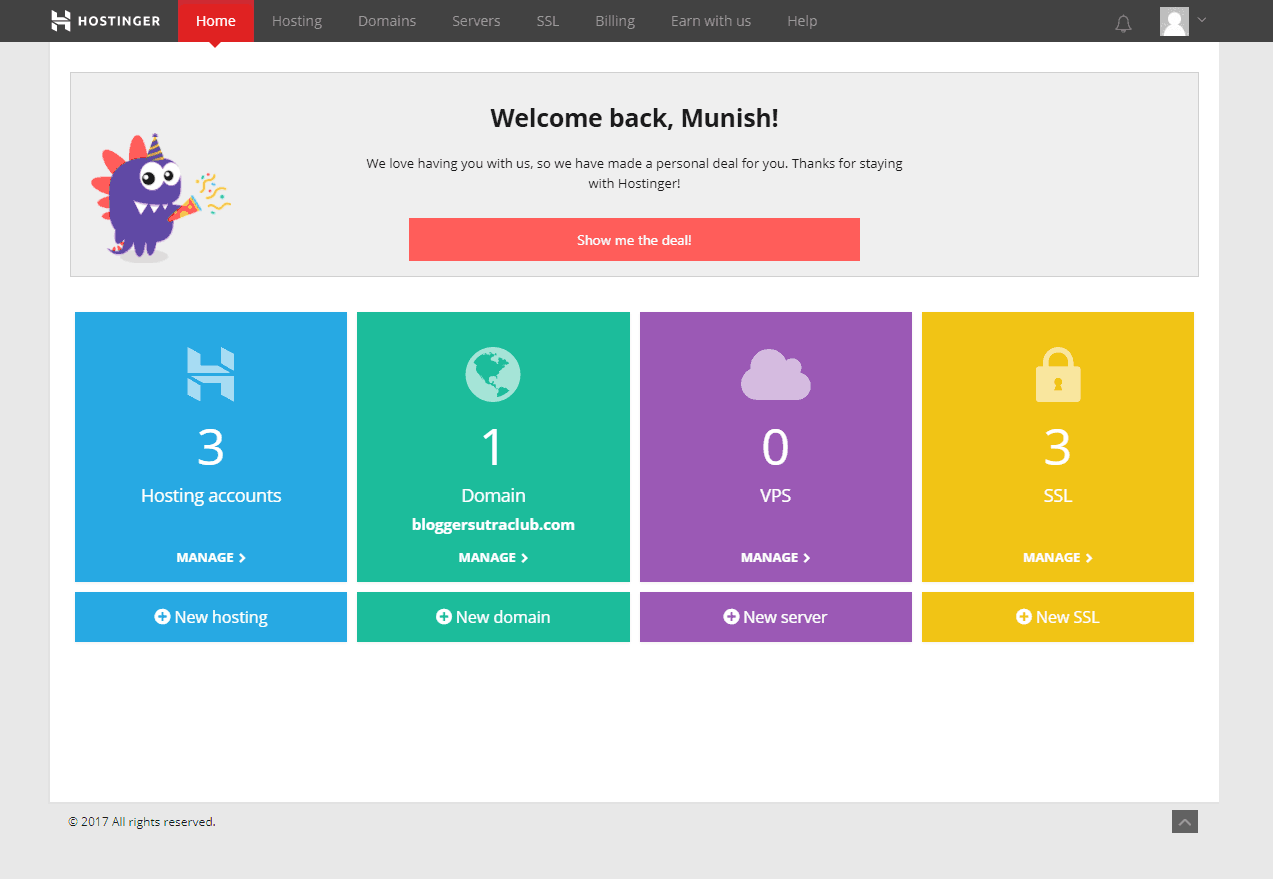
Step 3: This is your welcome screen. Here you can see the number of websites you are hosting. Your registered domain names with Hostinger. Grab your free domain name with Hostinger now.
You can also transfer your domain name from another hosting provider. You can purchase an additional SSL certificate for your domains.
Remember Hostinger will provide a Free SSL certificate for one domain with your hosting account.
The best part is that you can get this SSL certificate can be installed on any of the domains in your account and not necessary to get it installed on the free domain that you have registered with hosting.
Another good thing is that you can get your SSL certificate reinstalled on another domain at any point in time by contacting Hostinger customer support. As I had mentioned they have a great customer support service.
Step 4: Click on the hosting Tab on the menu bar. It will show all your hosted domains. If you have only a free domain name within your account your free domain name will be reflected here.
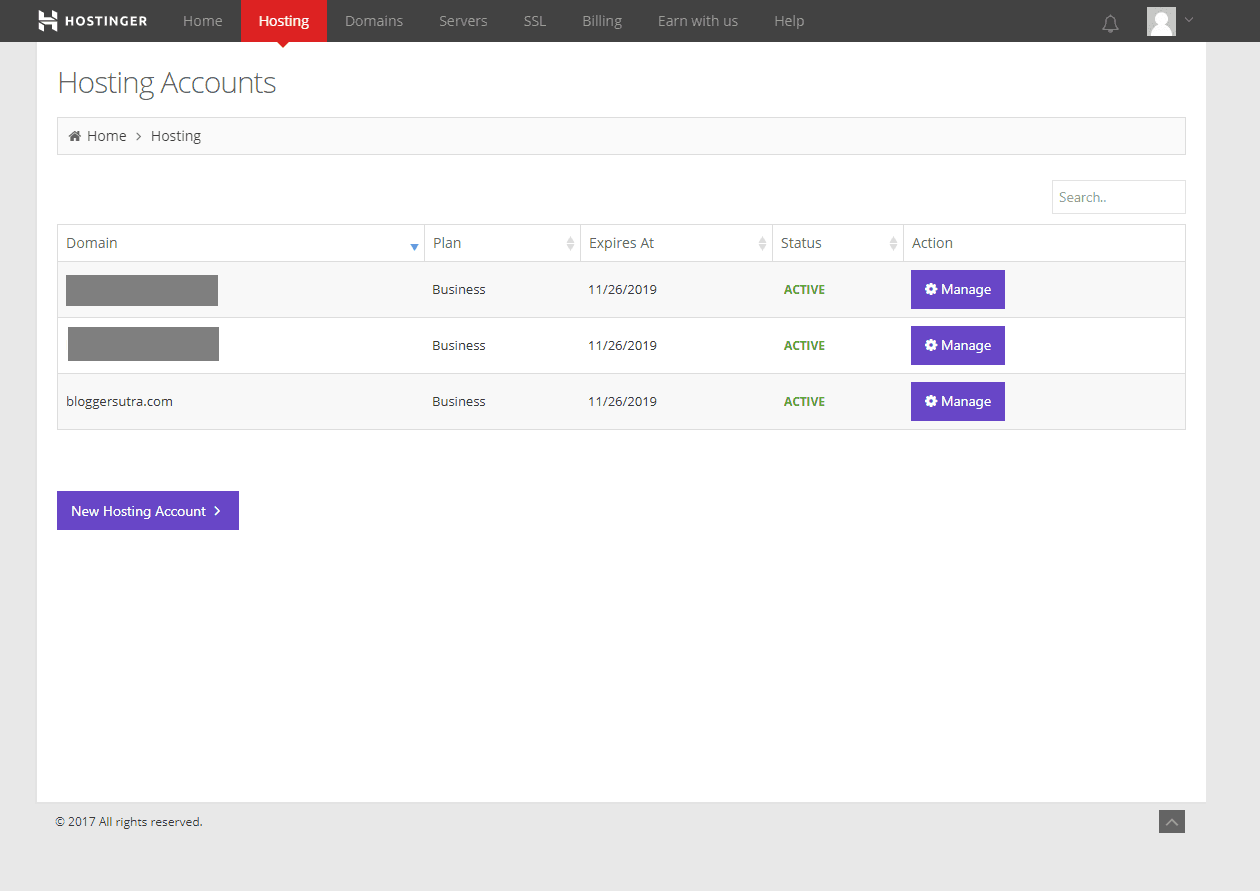
If in case you have your domain name registered with some other web hosting and you don’t want to transfer the domain name, you can simply change the name server details on your domain control panel.
Step 5: This is the additional step where we will show to add a website to your hosting account if you have not transferred your domain name to Hostinger.
Click o the manage button on the previous step >>> Scroll down and find add website under the domain subheading.
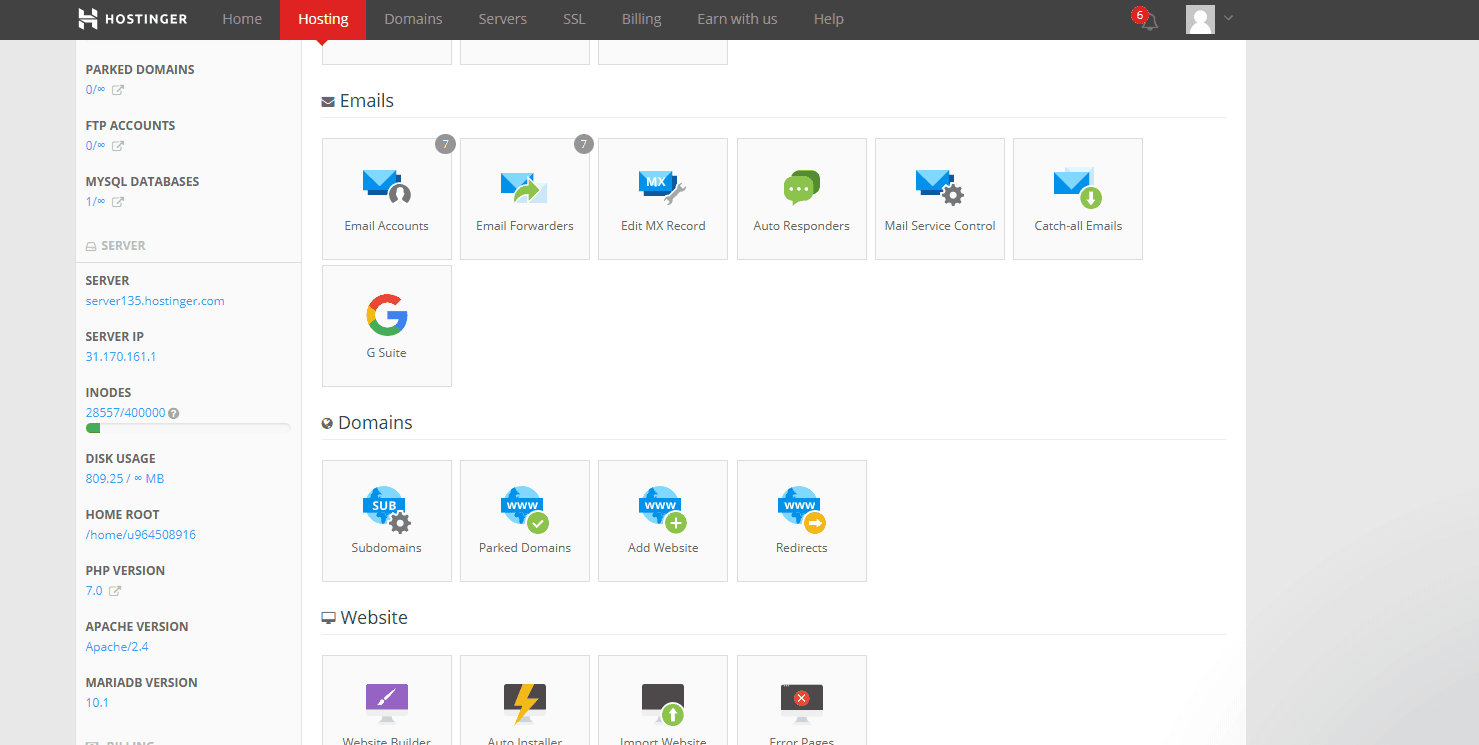
Under Add, website tab enter your domain name and set the password for the domain name of your choice.
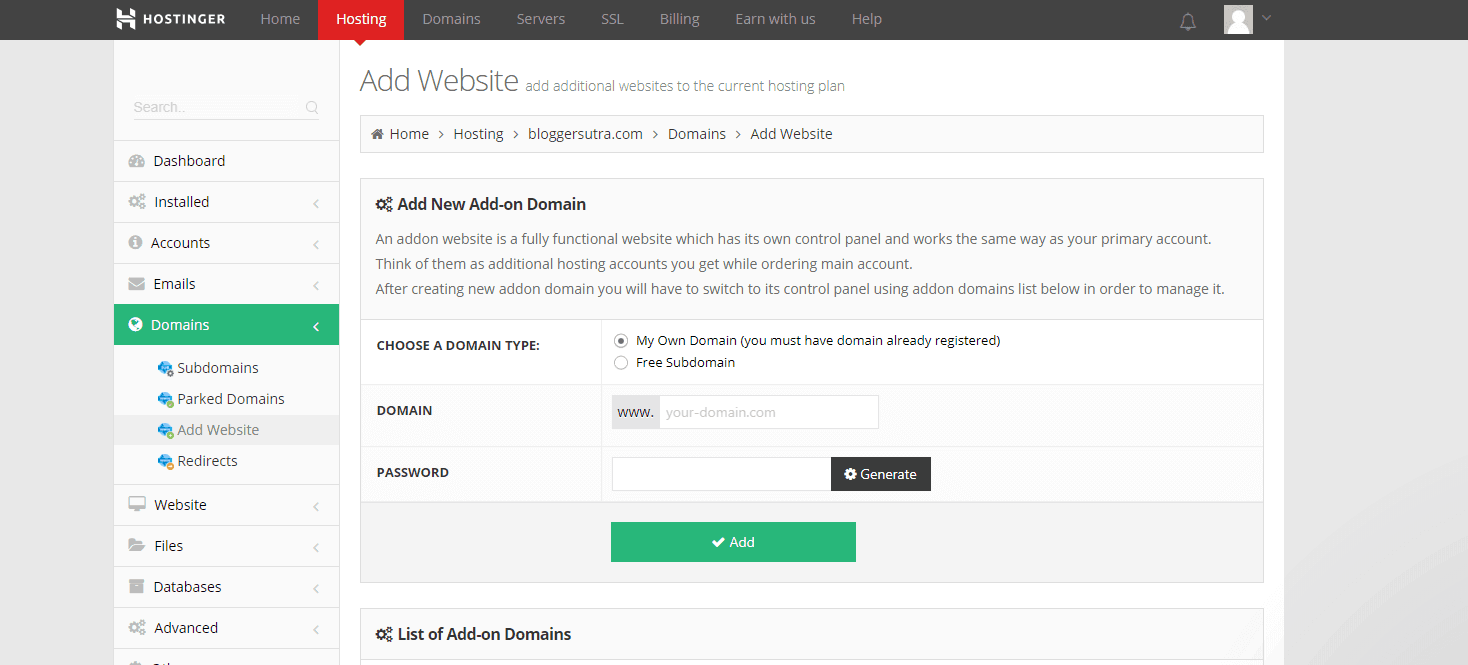
Click on Add button and your domain folder will be created. You can check it again by clicking on the hosting button on the menu bar.
Remember to change the name server for your domain name which you are planning to host here. Hostinger offers unlimited domain hosting under all its shared hosting plans.
Step 6: To install WordPress on any of the domains on your hosting account, just click on the Manage button next to the domain name in the hosting tab. Once you have a click you will be taken to the control panel to that respective domain.
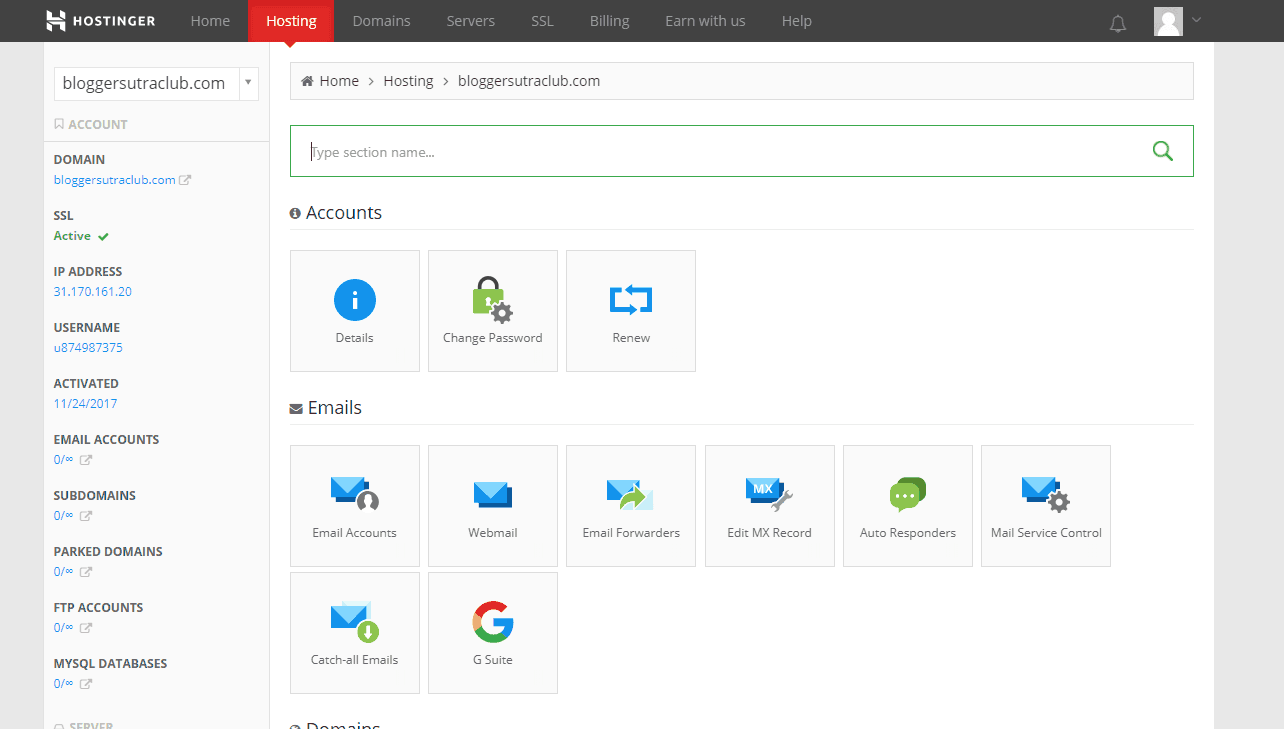
Scroll down and search for the Website subheading. Click on the auto-installer button.
Step 7: Find WordPress under the most popular content management system and In case you don’t find search for it.
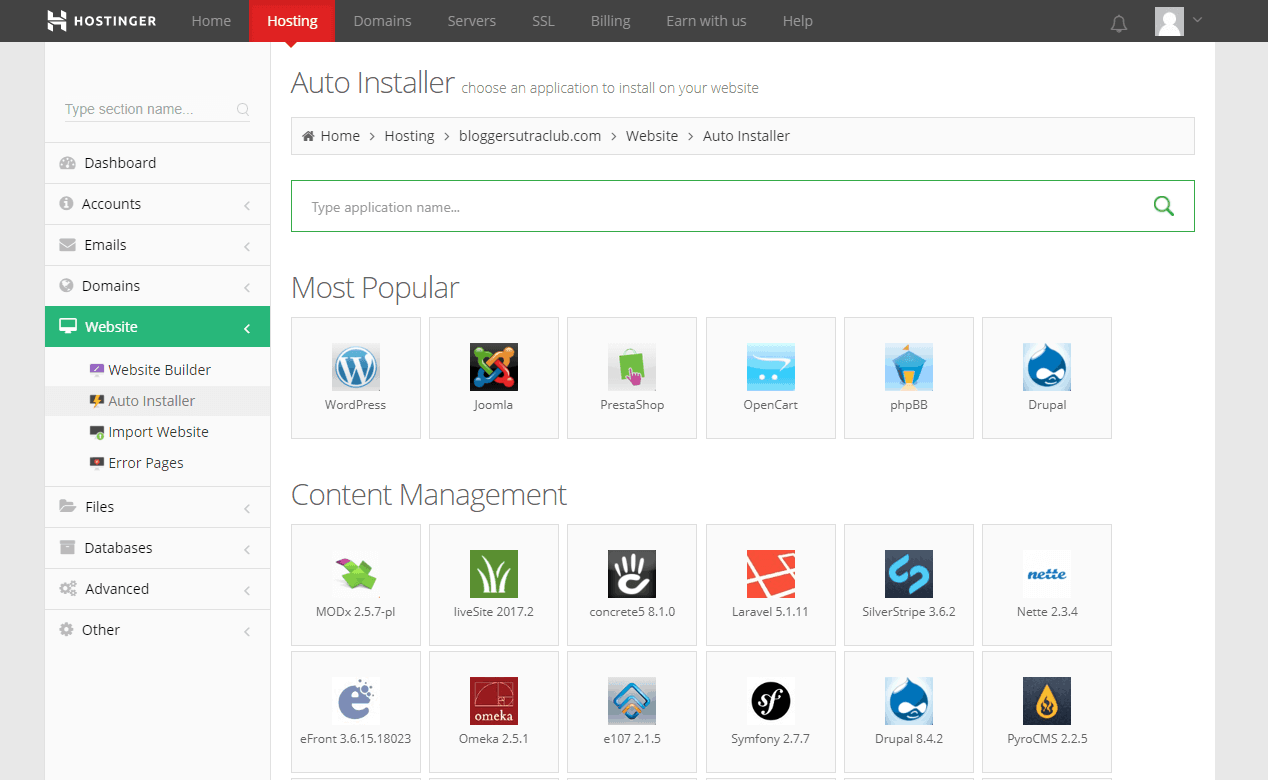
Click on WordPress.
Step 8: Select the domain name on which you want to install WordPress.
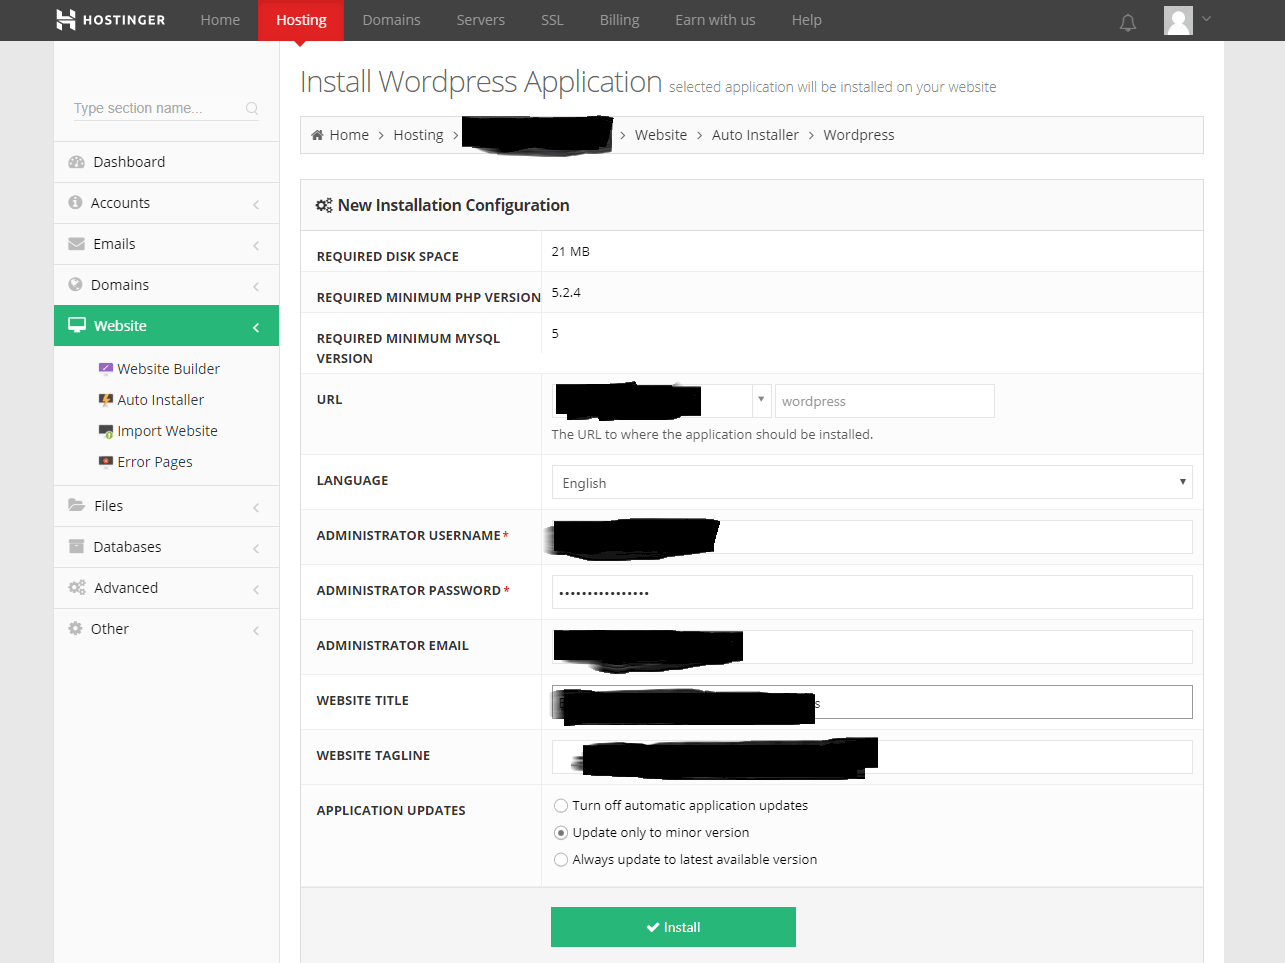
- Select language
- Choose and enter the administrator username and password
- Enter your administrator email address to recover the password in the future.
- Submit your website title and tagline ( optional). You can edit it from the WordPress admin panel after installation.
Click on the install button after entering all the details.
Step 9: Once the installation is completed you will see the installation date and the admin URL.
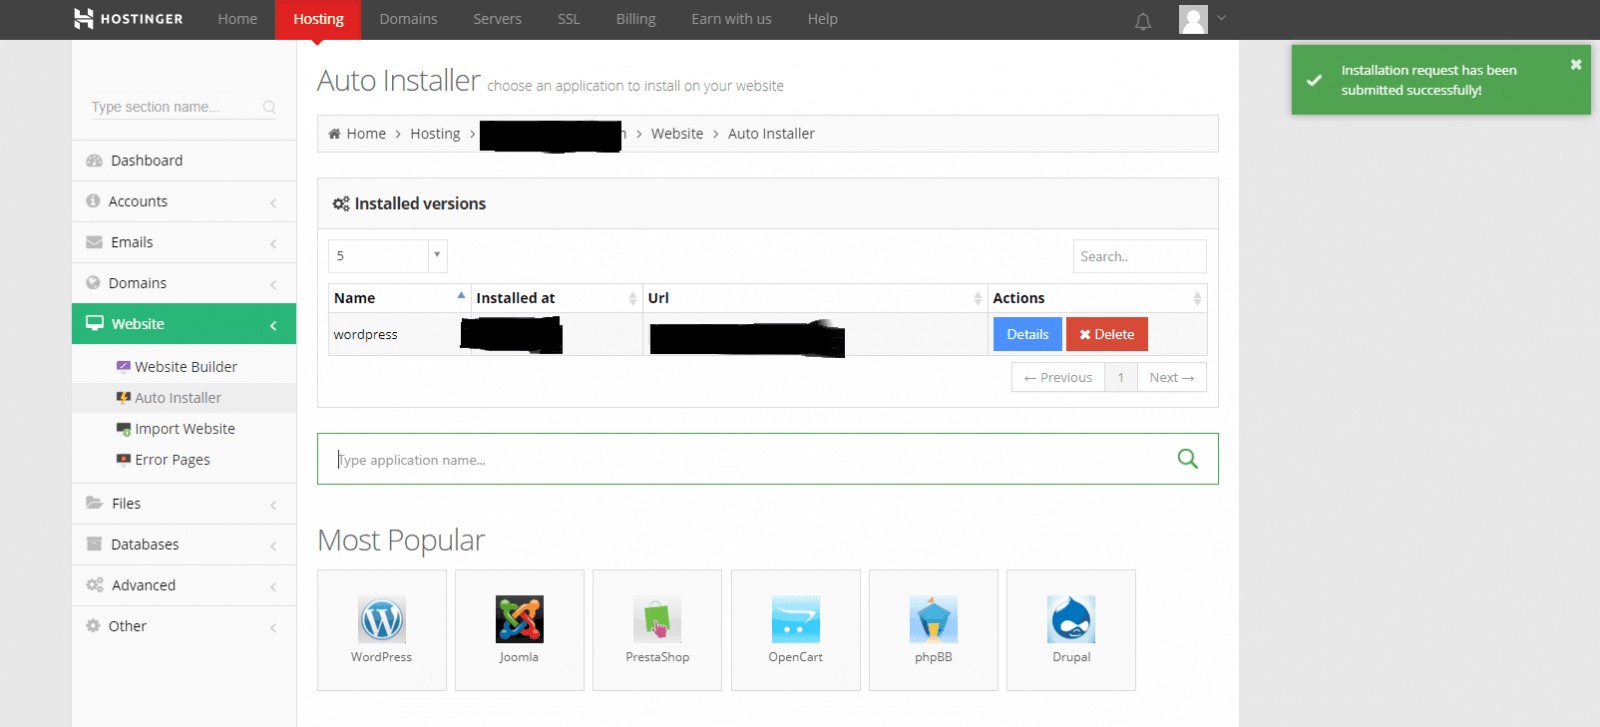
To go to your website WordPress admin panel – http://yourdomain.com/wp-admin
Your WordPress installation is now completed. Now it’s time to set up your blog and start posting articles.
(Use Coupon Code BH07)
Also Read,
- 10 Things To Consider While Selecting the Perfect WordPress Theme
- How To Install WordPress Theme For Beginners
- 50 Essential Settings after WordPress Installation
- 48 Tips To Make Your Website Hackproof – WordPress Ultimate Security Guide
- Get Ultimate SEO Results By Mastering WordPress Permalinks – Detailed Guide
Wrapping Up Hostinger Tutorial
Here you have gone through the Hostinger tutorial to Create a Blog in WordPress Step By Step. Well with the auto script installed, installation of WordPress is pretty easy.
You must go through the various guides mentioned above to establish your blog perfectly by leaving any stone unturned.
If you have any doubts or suggestions, please feel free to tell us in the comment section and still not started your blog then this is the right time to start your blog with Hostinger.
If you liked this article, then please subscribe to our YouTube Channel for WordPress video tutorials. You can also find us on Twitter and Facebook.


